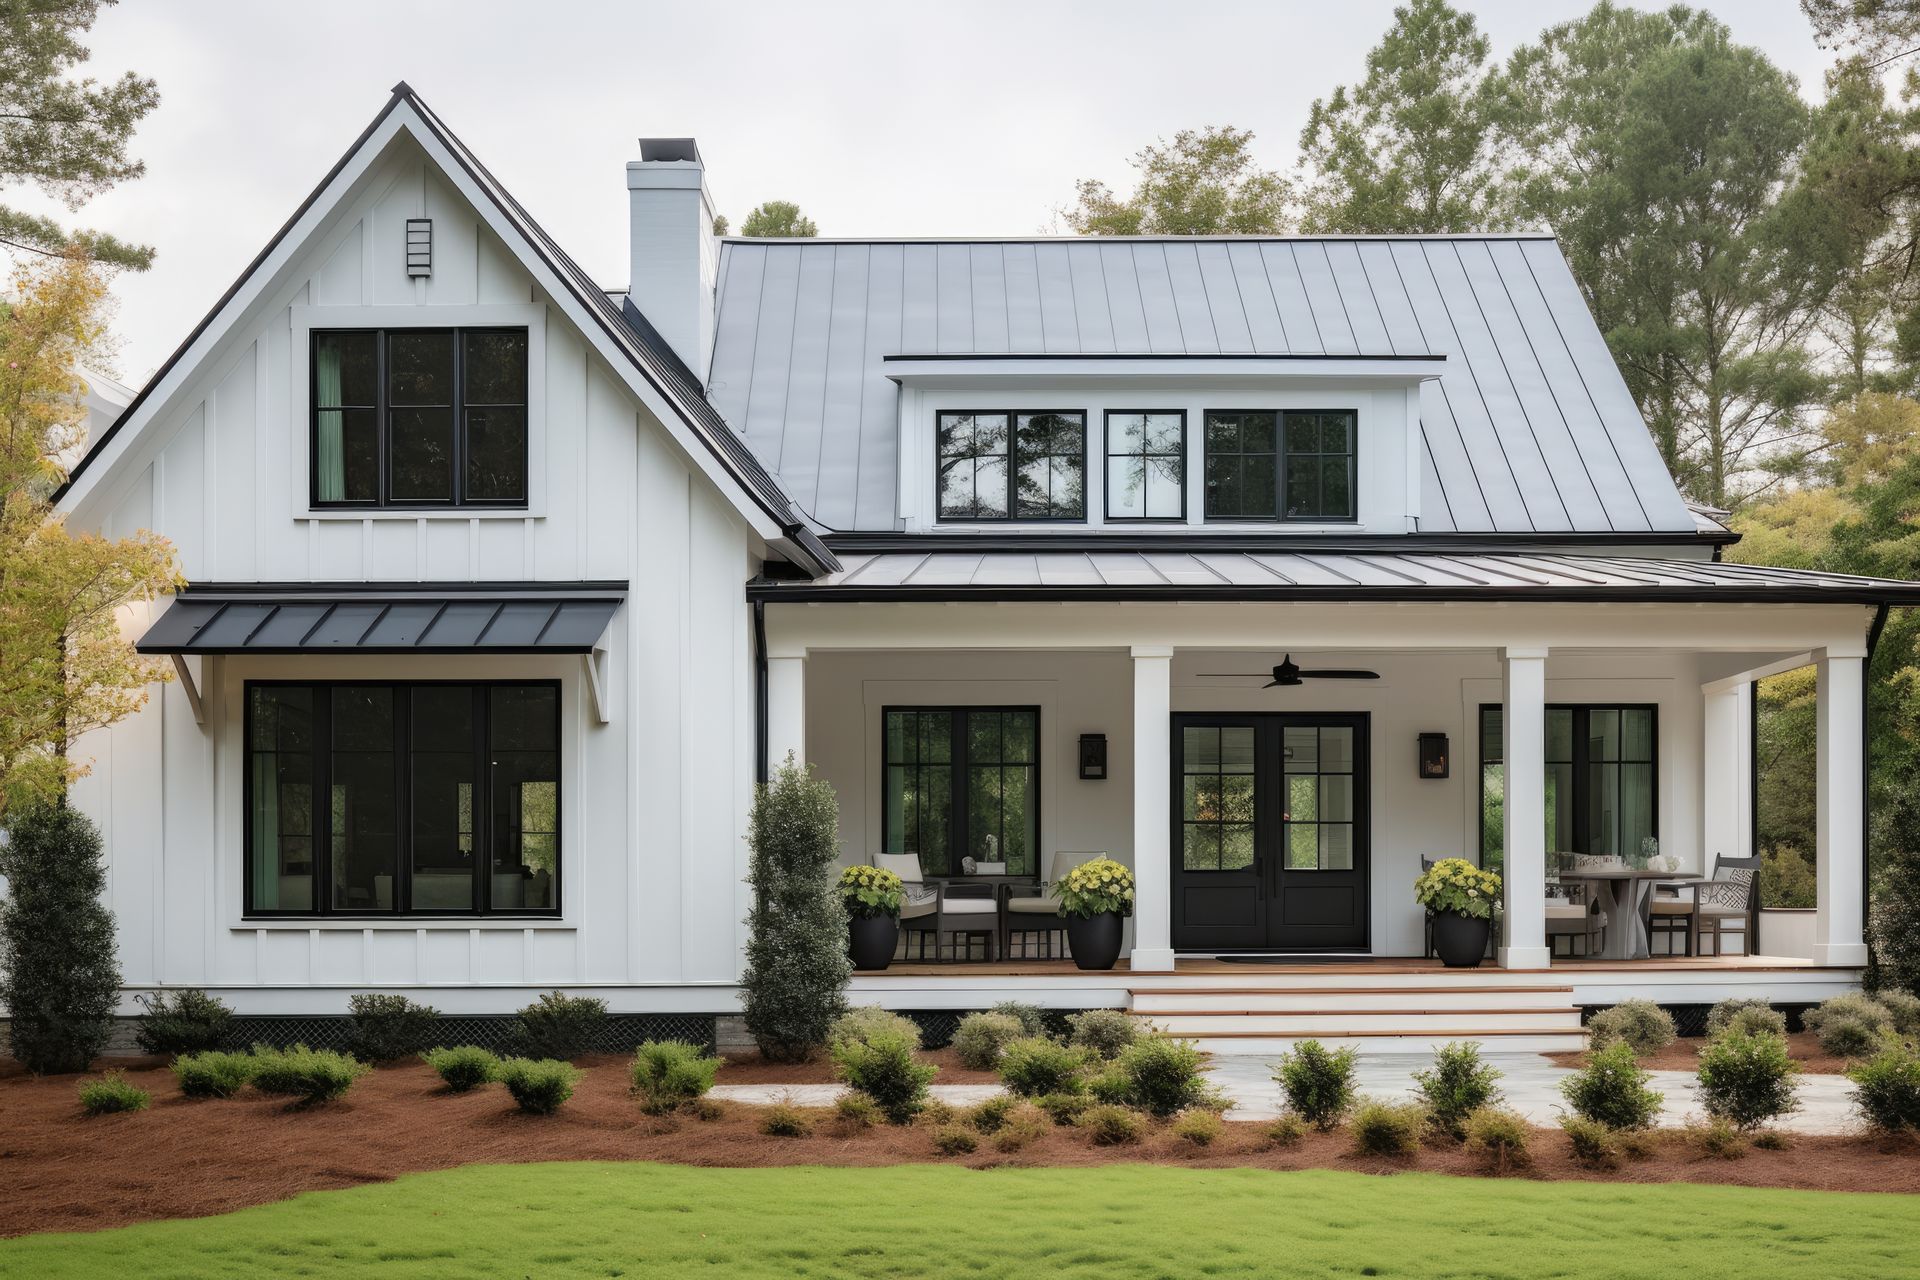
Ranch-Style Home Exterior Colors That Work in the Texas Landscape

Nikolle Bauder • September 15, 2025

The sprawling ranch-style homes that dot the Texas landscape represent more than just architectural preference—they embody a way of life that celebrates wide-open spaces, practical living, and a deep connection to the land. When it comes to selecting exterior paint colors for these iconic homes, the decision involves much more than personal taste or current design trends. The vast Texas landscape, with its intense sunlight, dramatic weather patterns, and distinctive natural palette, demands color choices that not only complement the architectural style but also work harmoniously with the environment while standing up to the state's challenging climate conditions. Understanding how to select colors that enhance your ranch home's natural beauty while providing practical benefits can transform your property into a stunning example of Texas living at its finest.


Understanding the Texas Landscape Context

The Texas landscape provides one of the most diverse and dramatic backdrops in the country, ranging from the desert beauty of West Texas to the lush piney woods of East Texas, with rolling hills, coastal plains, and prairie grasslands creating distinct regional character throughout the state. Each of these landscapes offers different color inspiration and presents unique challenges for exterior paint selection. The key to successful color selection lies in understanding your specific regional context and choosing colors that complement rather than compete with the natural environment surrounding your home.


West Texas landscapes, characterized by desert vegetation, rocky outcroppings, and vast sky views, naturally complement earth-tone color palettes that echo the region's natural sandstone, caliche, and desert plant life. The intense sunlight and minimal atmospheric moisture in these areas create conditions where colors appear more saturated and intense than they might in other climates, making it important to choose colors that won't become overwhelming under the harsh desert sun. The dramatic color changes that occur during Texas sunrises and sunsets also influence how exterior colors appear throughout the day, with warm earth tones taking on golden highlights during these magical times.


East Texas, with its dense forests, abundant water sources, and more humid climate, supports a different color approach that can incorporate deeper greens, rich browns, and colors that complement the lush vegetation and varied seasonal changes. The filtered light created by tree canopies and higher humidity levels can make colors appear softer and more muted, allowing for the use of slightly deeper or more complex color schemes that might be too intense in the stark desert regions.


Central Texas hill country offers perhaps the most varied color opportunities, with its limestone outcroppings, spring wildflower displays, and mix of grassland and forest creating a palette that can support everything from soft limestone whites to deep forest greens, depending on the specific location and surrounding vegetation. Understanding these regional differences is crucial for making color choices that feel authentic and appropriate to your specific location within the vast state of Texas.


The Ranch-Style Architecture Advantage

Ranch-style homes offer unique advantages for exterior color application due to their horizontal emphasis, large surface areas, and typically simple rooflines that create expansive canvases for color expression. The long, low profile of ranch homes naturally complements the Texas landscape's horizontal emphasis, and color choices can either enhance this harmony or create visual discord if not carefully considered. The architectural simplicity of most ranch homes means that color becomes one of the primary tools for creating visual interest and personality.


The extensive wall surfaces typical of ranch homes provide opportunities to use color in ways that wouldn't work on more vertically oriented architectural styles. These large expanses can successfully carry colors that might overwhelm smaller homes, and they provide the space needed to create sophisticated color schemes that incorporate multiple harmonious colors without appearing busy or fragmented. The horizontal board-and-batten siding, brick, or stone commonly found on ranch homes also affects how colors appear, with different materials reflecting and absorbing light differently and influencing the final color appearance.


Window placement and proportion in ranch homes typically create strong horizontal lines that can be enhanced through strategic color choices. Using darker colors on window trim and lighter colors on main wall surfaces can emphasize the horizontal emphasis that makes ranch homes so well-suited to Texas landscapes, while reverse color schemes can create more dramatic contrast effects when desired. The relationship between foundation materials, wall colors, and roof colors becomes particularly important in ranch homes because of the visibility of all these elements from typical viewing angles.


Climate Considerations for Color Selection

Texas climate conditions create unique challenges for exterior paint that go far beyond simple aesthetic considerations. The intense UV radiation, extreme temperature variations, and occasional severe weather events all affect paint performance and color retention over time. Understanding these factors helps ensure that color choices not only look great initially but maintain their appearance for years under challenging Texas conditions.


UV radiation in Texas is among the most intense in the continental United States, particularly in southern and western regions of the state. This intense sunlight can cause certain paint pigments to fade or shift over time, with some colors being much more susceptible to UV degradation than others. Organic pigments, which create many bright and deep colors, are generally more susceptible to UV damage than inorganic pigments, which tend to produce more muted earth tones. This doesn't mean that vibrant colors are impossible in Texas, but it does mean that color selection should consider long-term UV stability to ensure lasting beauty.


Temperature extremes in Texas can cause paint to expand and contract repeatedly, leading to premature failure if colors and paint formulations aren't chosen appropriately. Light colors reflect heat and can help reduce thermal stress on exterior surfaces, while dark colors absorb heat and can reach surface temperatures that stress both the paint and underlying materials. This thermal consideration becomes particularly important for south and west-facing surfaces that receive the most intense sun exposure during the hottest parts of the day.


Humidity variations across Texas also affect paint performance, with coastal areas experiencing high humidity that can affect paint curing and long-term adhesion, while arid regions may present challenges related to rapid moisture loss during paint application. These climate factors influence both color selection and paint formulation choices, making it important to work with painting professionals who understand regional climate impacts on exterior paint performance.


Earth Tone Foundations for Timeless Appeal

Earth tone color palettes provide the most reliable foundation for ranch-style homes in Texas because they naturally harmonize with the landscape while offering excellent practical performance under challenging climate conditions. These colors, inspired by natural materials like stone, clay, sand, and dried vegetation, create a sense of permanence and belonging that enhances the ranch home's connection to the land. The key to successful earth tone application lies in understanding the subtle variations and undertones that can create sophisticated color schemes while maintaining the natural harmony that makes these colors so effective.


Warm beiges and tans offer versatile base colors that work throughout Texas, providing neutral backgrounds that complement both desert and forest environments while reflecting enough light to minimize heat absorption. These colors can range from pale sand tones that echo West Texas desert conditions to richer, more complex beiges that incorporate subtle gray or brown undertones suitable for more varied landscapes. The key is selecting beiges with appropriate undertones that complement rather than clash with surrounding natural colors and existing landscape materials like stone or brick.


Gray color families have gained popularity for ranch homes because they provide sophisticated neutrals that work well with both traditional and contemporary design elements. Texas-appropriate grays range from warm grays with beige undertones that complement limestone and caliche common throughout the state to cooler grays that work well in forested areas with abundant green vegetation. The key to successful gray application lies in choosing grays with appropriate warmth levels and avoiding colors that appear too stark or cold against Texas's naturally warm landscape palette.


Brown color families offer rich, grounding options that work particularly well for ranch homes in heavily wooded areas or regions with abundant natural stone. These colors can range from light cocoa tones that provide warmth without excessive heat absorption to deeper chocolate browns that create dramatic contrast when used strategically with lighter accent colors. The challenge with brown colors lies in selecting shades that enhance rather than overwhelm the home's architectural features while maintaining appropriate contrast with roofing and trim elements.


Regional Color Adaptations

Different regions of Texas offer distinct color opportunities that reflect local landscape characteristics and cultural traditions. Understanding these regional preferences can help homeowners make color choices that feel authentic and appropriate to their specific location while avoiding colors that might seem out of place or forced. These regional considerations go beyond simple color preference to include practical factors like local material availability, traditional building practices, and climate-specific performance requirements.


South Texas ranch homes often benefit from color schemes that acknowledge the area's Mexican and Spanish colonial influences while adapting to the intense sun and heat common in this region. Warm terra cotta, soft coral, and sage green colors can provide cultural authenticity while offering practical heat reflection properties. These colors work particularly well when combined with white or cream trim that provides contrast while maintaining the overall warm color harmony appropriate to the region's cultural and climatic context.


Hill Country ranch homes can successfully incorporate colors inspired by the region's famous limestone outcroppings and seasonal wildflower displays. Soft limestone whites and creams provide classic options that never go out of style, while subtle lavender grays can echo the area's famous bluebonnet displays without becoming overly themed or clichéd. The key is selecting colors that suggest rather than literally copy natural inspirations, creating sophisticated color schemes that complement without competing with the natural beauty of the Hill Country landscape.


East Texas ranch homes in forested areas can support deeper, richer color schemes that might be too intense for more arid regions of the state. Forest greens, deep browns, and even sophisticated burgundy tones can work well when balanced with appropriate lighter accent colors and when applied to homes that are partially shaded by mature trees. These deeper colors can help homes blend naturally into forested environments while providing dramatic beauty that celebrates the lush vegetation common in East Texas.


Accent Color Strategies

While main body colors provide the foundation for ranch home exterior color schemes, accent colors applied to trim, shutters, doors, and architectural details offer opportunities to add personality and visual interest without overwhelming the overall design. The large scale of most ranch homes means that accent colors can be more dramatic than might work on smaller architectural styles, but they still need to be carefully selected and applied to enhance rather than compete with the main color scheme.


White and cream accent colors provide classic, timeless options that work with virtually any main body color while creating clean, crisp contrast that emphasizes architectural details. These light accent colors also provide practical benefits by reflecting heat away from trim elements that might otherwise absorb excessive heat and experience premature paint failure. The key to successful white and cream accent application lies in selecting shades with appropriate undertones that complement rather than clash with the main body color's undertones.


Natural wood tones, whether achieved through stain application or paint colors that mimic wood, can provide warmth and texture that enhances the ranch home's connection to natural materials. These colors work particularly well for elements like shutters, garage doors, and front doors where the natural material appearance adds authenticity and visual interest. The challenge lies in selecting wood tones that coordinate with both the main body color and the surrounding landscape while providing appropriate contrast for visual definition.


Bold accent colors can work successfully on ranch homes when applied judiciously to elements like front doors or small architectural details where they provide focal points without overwhelming the overall design. Colors like deep red, forest green, or navy blue can add personality and character while remaining appropriate to the Texas landscape context. The key is using these bold colors sparingly and ensuring they coordinate with both the main color scheme and the surrounding natural environment.


Practical Application Considerations

Successfully implementing exterior color schemes on ranch homes requires understanding how different surfaces, materials, and architectural elements interact with color choices. The large scale of ranch homes means that color application techniques and coverage considerations become more important than they might be for smaller homes, and the extensive surface areas involved make quality and durability crucial factors in both color and product selection.


Surface preparation becomes particularly important for ranch homes because of the extensive areas involved and the high visibility of any imperfections or failures. Proper cleaning, priming, and repair of existing surfaces ensures that new color applications will perform well and maintain their appearance over time. The horizontal emphasis of ranch architecture means that any surface imperfections or color inconsistencies become highly visible, making thorough preparation essential for professional-quality results.


Color coordination between different materials requires careful planning when ranch homes incorporate multiple exterior materials like brick, stone, wood, and metal. Each material interacts differently with paint colors, and achieving harmonious color schemes requires understanding these interactions and planning color applications accordingly. Professional color consultation can be particularly valuable for complex material combinations to ensure successful integration of all elements.


Long-term maintenance considerations should influence both color selection and application planning for ranch homes. The extensive surface areas involved make maintenance a significant undertaking, so choosing colors and paint systems that provide maximum durability and fade resistance can significantly reduce long-term maintenance requirements. Understanding the maintenance implications of different color choices helps ensure that beautiful initial results can be maintained efficiently over time.


Creating Lasting Texas Beauty

Ranch-style homes offer unique opportunities to create exterior color schemes that celebrate both architectural tradition and regional landscape beauty. The key to success lies in understanding the relationship between color, climate, and landscape while making choices that enhance rather than compete with the natural Texas environment. When color selection, material coordination, and application quality all work together, the result is a home that feels perfectly suited to its Texas setting while providing lasting beauty and practical performance.


The investment in professional color consultation and application pays dividends in both immediate visual impact and long-term satisfaction with your ranch home's appearance. Quality color schemes properly applied can enhance property value while reducing maintenance requirements and ensuring that your home remains a source of pride for years to come. The extensive surface areas of ranch homes make professional application particularly valuable, as the scale involved requires expertise and equipment that ensure consistent, high-quality results across large areas.


When you're ready to transform your Texas ranch home with colors that celebrate both architectural tradition and regional landscape beauty, the experienced professionals at Hutch-N-Son Painting bring over 35 years of expertise to every project. Since 1985, we've been helping Dallas-Fort Worth area homeowners create stunning exterior color schemes that enhance their homes' natural beauty while standing up to Texas's challenging climate conditions. Our team understands the unique considerations involved in ranch home color selection and application, from regional landscape harmony to practical performance requirements. Contact Hutch-N-Son Painting today for a free consultation and discover how professional color expertise can help your ranch home achieve its full potential as a beautiful, enduring part of the Texas landscape.
By Nikolle Bauder October 28, 2025
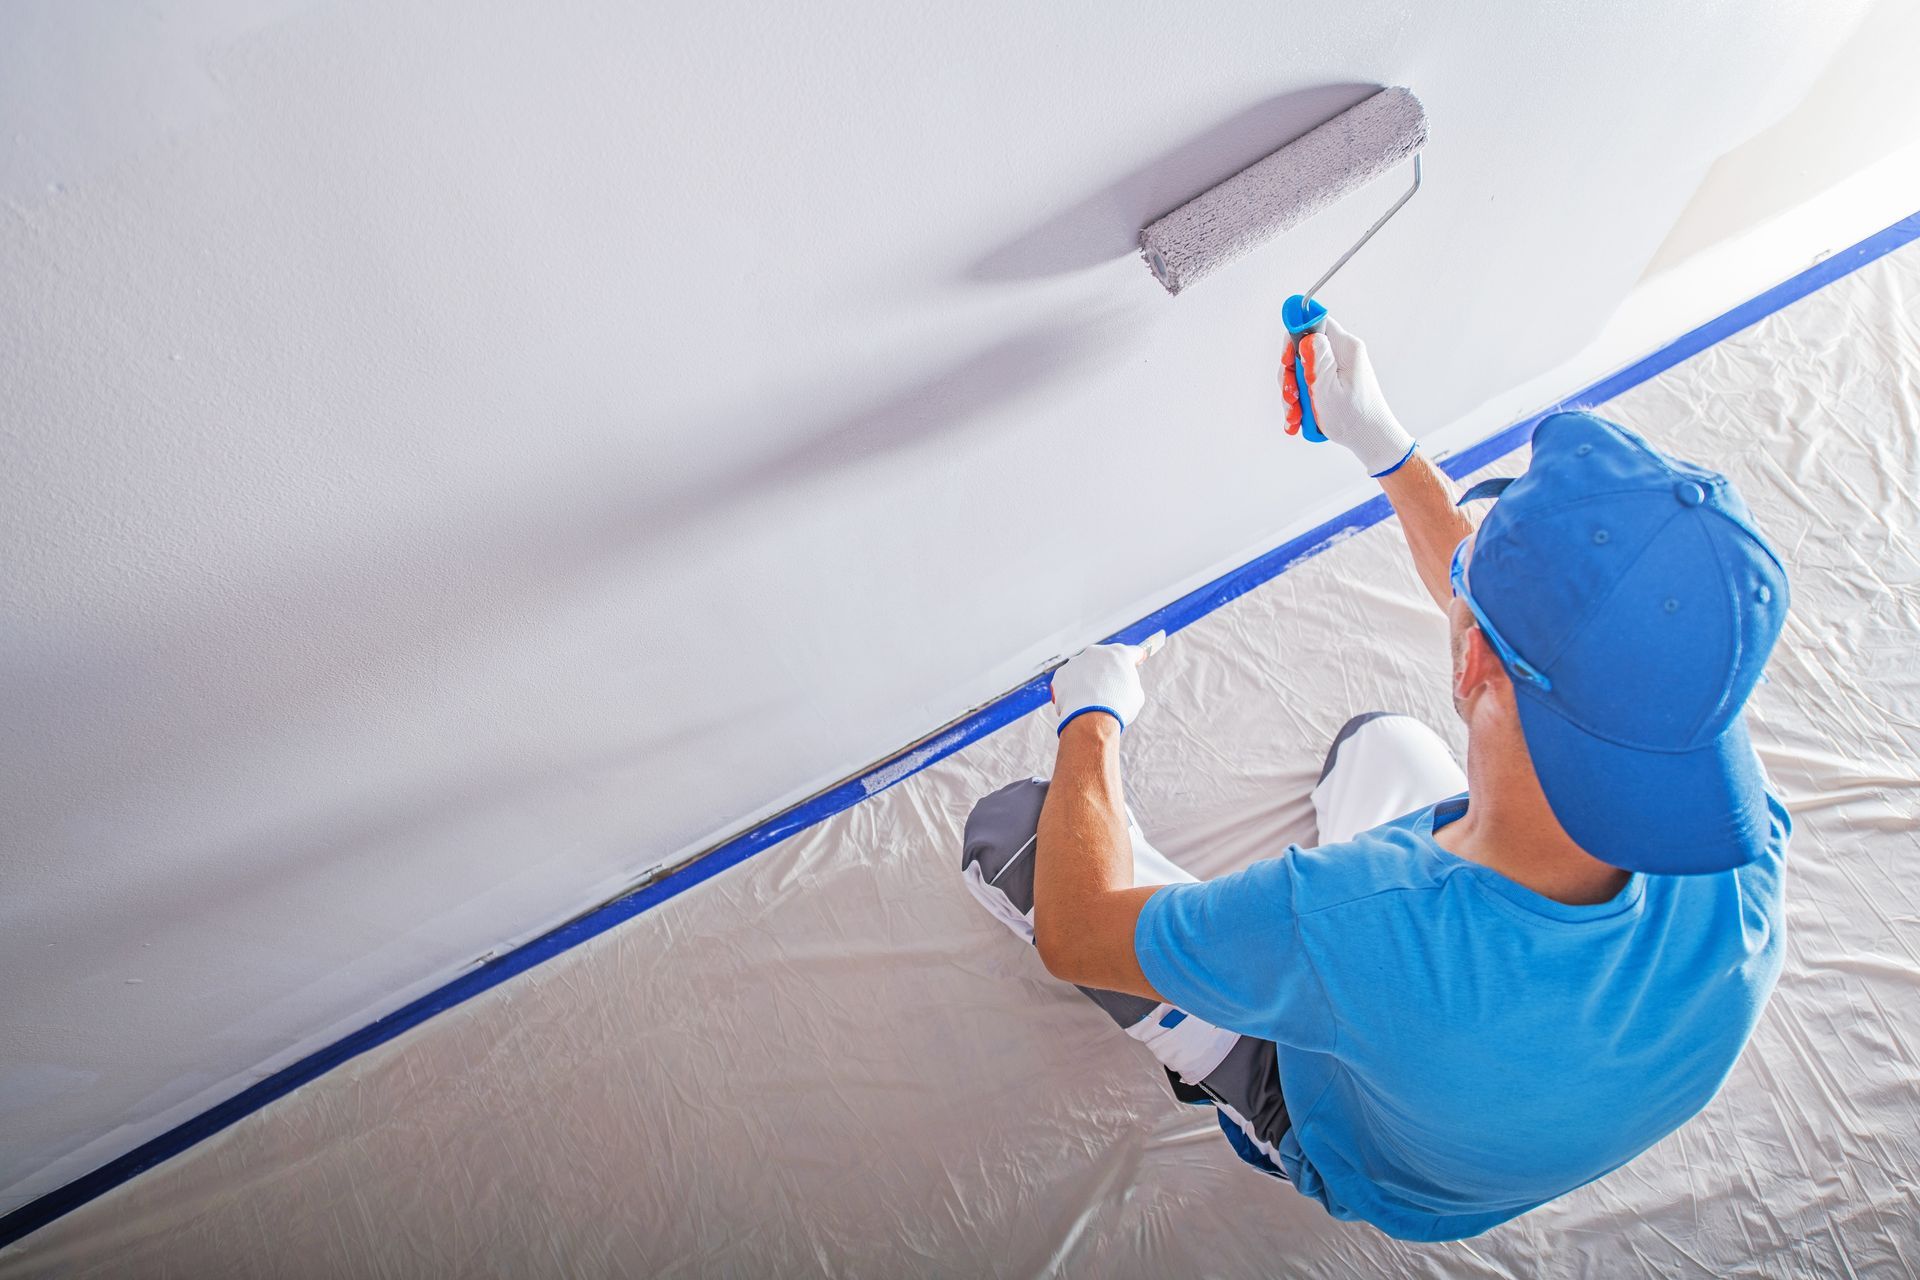
Crown molding and decorative trim represent some of the most transformative architectural elements homeowners can add to their Dallas-Fort Worth area properties, instantly elevating ordinary rooms into sophisticated spaces that exude elegance, craftsmanship, and timeless appeal. While many Plano, McKinney, and Frisco homeowners appreciate the visual impact these features create, few understand the critical role that proper painting techniques play in maximizing their aesthetic potential and ensuring these investments deliver the refined appearance that makes crown molding and trim worth installing in the first place. The difference between crown molding that adds genuine elegance to your home and trim work that appears amateurish or distracting often comes down to the quality of the painting application, color selection, and finishing techniques that either enhance or undermine these architectural details that can make your home feel custom and high-end rather than basic and builder-grade. Understanding the architectural purpose of crown molding and trim helps homeowners appreciate why these elements deserve the specialized painting attention they require to fulfill their design potential and justify their installation costs. Crown molding serves multiple functions beyond simple decoration, creating visual transitions between walls and ceilings that make rooms feel more finished and proportional while adding dimensional interest that flat surfaces lack. Quality trim work around windows, doors, and baseboards frames architectural openings and creates definition that makes spaces feel intentionally designed rather than hastily constructed. These elements work together to create the layered, sophisticated appearance that distinguishes custom homes from basic construction, but only when they're painted with the precision and attention to detail that highlights rather than obscures their refined profiles and proportions. The psychology of perceived quality in interior spaces heavily depends on the execution of details like crown molding and trim painting, since these visible finish elements immediately communicate the level of care and craftsmanship invested throughout the home. Perfectly painted trim with crisp, clean lines suggests attention to detail that extends to aspects buyers can't see, while sloppy painting with visible brush marks, color bleeding, or inconsistent coverage signals corner-cutting that raises questions about overall construction quality. This perception significantly impacts both daily enjoyment of your living spaces and eventual resale value, making professional-quality trim painting an investment in both immediate aesthetic pleasure and long-term property value that extends far beyond the cost of materials and labor involved in the painting process itself. Color theory and contrast principles become particularly important when painting crown molding and trim, since these elements must either blend harmoniously with wall colors or provide deliberate contrast that enhances rather than conflicts with the overall room design. Traditional approaches often favor painting trim in colors lighter than wall surfaces, creating definition through subtle contrast that makes architectural details more prominent without overwhelming the space. However, contemporary design trends increasingly embrace dramatic contrast through dark trim against light walls or monochromatic schemes where trim and walls share similar tones but different sheens that create subtle definition through light reflection rather than color variance. Understanding these options and their visual effects helps homeowners make informed decisions that enhance their specific room proportions and design goals rather than simply following generic advice that may not suit their particular circumstances. Surface preparation requirements for crown molding and trim differ significantly from wall painting, demanding more meticulous attention to detail and specialized techniques that ensure paint adheres properly to these three-dimensional surfaces while creating the smooth, flawless finish that makes architectural details appear professional rather than DIY. New wood trim requires careful sanding to remove mill marks and imperfections, proper priming to seal wood grain and prevent tannin bleeding, and filling of nail holes and joints with quality wood filler that won't shrink or crack over time. Previously painted trim often needs more extensive preparation including removal of loose or peeling paint, repair of damaged areas, and thorough cleaning to remove accumulated dirt and grease that can prevent proper adhesion of new coatings. This preparation phase typically requires more time than the actual painting but determines whether the finished result looks professional or amateurish. Material selection for crown molding and trim painting involves choosing products specifically formulated to handle the unique challenges these applications present, including resistance to wear from cleaning, durability in high-touch areas, and the ability to maintain crisp lines and smooth surfaces over time. Semi-gloss and satin sheens typically work best for trim applications because they provide durability and cleanability while maintaining the sophisticated appearance that makes architectural details attractive. However, sheen selection must also consider room lighting, wall colors, and personal preferences, since higher sheens amplify both positive details and surface imperfections that might remain invisible under flat finishes. Quality primer selection becomes particularly crucial for trim painting because these surfaces often involve different materials, previous coatings, and stress points that require specialized adhesion and blocking properties to prevent future problems. Professional application techniques separate exceptional trim painting from adequate results, with specific methods required to achieve the clean lines, uniform coverage, and flawless finish that makes crown molding and trim appear elegant rather than sloppy. Brush selection and technique significantly affect final appearance, with high-quality angled brushes allowing precise control around detailed profiles while maintaining smooth application that doesn't leave visible brush marks or texture inconsistencies. Cutting in techniques require steady hands and proper brush loading to create clean transitions between trim and wall colors without bleeding or overlapping that creates unprofessional appearance. Multiple thin coats typically produce superior results compared to single thick applications, allowing each layer to level properly while building up the uniform coverage and depth of color that makes trim work appear substantial and well-executed. Timing and sequence considerations affect both the efficiency and quality of crown molding and trim painting projects, with proper planning ensuring that each element receives appropriate attention while minimizing the risk of damage to completed work. Trim painting typically occurs after wall painting when protecting finished trim becomes easier, though this sequence requires careful masking and protection to prevent wall paint from contaminating trim surfaces. However, some situations benefit from priming trim before wall painting, particularly when using different primer types or when trim requires extensive preparation that might damage wall surfaces. Understanding these timing considerations helps ensure efficient project completion while maintaining quality standards throughout the process. Detail work and precision requirements for crown molding painting demand specialized skills and techniques that distinguish professional results from amateur attempts, particularly around complex intersections, corners, and junction points where different trim elements meet. Coping and mitering details require careful paint application that doesn't obscure the precise fits that make these joints appear seamless and professional. Inside and outside corners present particular challenges, often requiring hand-brushing techniques that ensure complete coverage while maintaining clean lines and preventing paint buildup that can blur crisp architectural details. These precision requirements explain why crown molding and trim painting often takes significantly longer than wall painting despite covering much smaller surface areas. Color coordination strategies help homeowners select trim colors that enhance their overall design vision while avoiding common mistakes that can make architectural details feel disconnected from the broader room aesthetic. Monochromatic approaches using variations of the same color family create sophisticated, unified appearance that makes spaces feel larger and more cohesive, while contrasting schemes can define architectural elements more dramatically but require careful balance to avoid overwhelming the space. White and off-white trim colors remain popular because they coordinate with virtually any wall color while creating the classic, timeless appearance that appeals to broad audiences, but bolder trim colors can create distinctive character when executed thoughtfully on appropriate architecture. Understanding how different color approaches affect room perception helps homeowners make choices aligned with their design goals and lifestyle preferences. Maintenance and longevity considerations become important factors in crown molding and trim painting decisions, since these high-visibility elements require consistent appearance over time to maintain their elegant contribution to interior design. Quality paint systems and proper application techniques significantly extend the time between repainting cycles, protecting the investment in both materials and installation labor while maintaining the refined appearance that makes these architectural elements worthwhile. However, even quality trim painting eventually requires refreshing, and understanding maintenance requirements helps homeowners plan for long-term care that preserves their investment. Regular cleaning, prompt attention to damage, and periodic touch-ups help extend paint life while maintaining the crisp, clean appearance that makes crown molding and trim attractive. Common mistakes in crown molding and trim painting can undermine even quality millwork, creating results that detract from rather than enhance interior aesthetics despite significant investment in materials and installation. Poor surface preparation frequently causes premature paint failure, while inadequate primer selection can result in tannin bleeding, poor adhesion, or color variations that become apparent over time. Rushing application techniques often produces visible brush marks, uneven coverage, or bleeding between trim and wall colors that creates unprofessional appearance. Using inappropriate paint products—particularly flat sheens that show every fingerprint or low-quality paints that don't provide adequate coverage—can make expensive trim work appear cheap and poorly executed despite perfect installation. Design integration principles help ensure that painted crown molding and trim enhance rather than compete with other room elements, creating cohesive spaces where architectural details support the overall aesthetic vision rather than appearing randomly applied or disconnected from the design concept. Room proportions significantly influence appropriate trim size and color choices, with larger moldings requiring different color approaches than delicate profiles to maintain visual balance. Furniture placement, lighting design, and decorative elements all interact with painted trim colors, requiring thoughtful coordination that considers the complete room environment rather than treating trim painting as an isolated decision. Understanding these relationships helps homeowners create spaces where all elements work together harmoniously. Historical and architectural authenticity considerations become relevant for homes where crown molding and trim should honor the original design intent rather than imposing contemporary preferences that conflict with the architectural style. Colonial homes, craftsman bungalows, and traditional styles each carry specific conventions about appropriate trim colors and finishes that help maintain period authenticity while accommodating modern preferences. However, contemporary homes offer more flexibility in trim color selection, allowing for bolder choices that might appear inappropriate on historical architecture. Understanding these distinctions helps homeowners make choices that enhance rather than undermine their home's architectural character while achieving the aesthetic goals that motivated the crown molding installation. Professional versus DIY considerations involve understanding the skill level, time commitment, and tool requirements necessary to achieve professional-quality crown molding and trim painting results that justify the investment in these architectural elements. While wall painting can often be successfully completed by determined homeowners, trim painting demands precision, technique, and experience that typically produce better results when handled by professional painters who specialize in detailed finish work. The cost difference between professional and DIY trim painting often proves minimal when considering the time investment, tool requirements, and risk of unsatisfactory results that require professional correction anyway. Additionally, professional painters carry insurance coverage that protects homeowners from liability and provides recourse if problems develop with the completed work. Technology and tool advances continue to improve crown molding and trim painting outcomes through better brushes, specialized application tools, and improved paint formulations designed specifically for detailed finish work. High-quality synthetic brushes now rival natural bristle performance while offering easier cleanup and longer service life. Paint additives that extend working time and improve leveling help achieve smoother finishes, while specialized masking products create cleaner lines with less risk of bleeding or damage during removal. Professional painters invest in these advanced tools and materials, leveraging technology improvements to deliver superior results more efficiently than DIY approaches using basic consumer-grade equipment. Cost-benefit analysis of crown molding and trim painting reveals that professional-quality work provides excellent return on investment through both immediate aesthetic enhancement and long-term property value protection that extends far beyond the initial expense. Quality trim painting can make builder-grade millwork appear custom and expensive, while poor painting can make expensive custom millwork look cheap and poorly executed. This multiplier effect means that investing in professional painting maximizes the value of crown molding and trim installation while ensuring these elements contribute positively to both daily enjoyment and eventual resale appeal. The difference in cost between adequate and exceptional trim painting often proves minimal compared to the dramatic difference in results and longevity. When you're ready to transform your home's interior with elegantly painted crown molding and trim that showcases the architectural details and craftsmanship your space deserves, Hutch'N'Son Painting brings the specialized skills and attention to detail that Dallas-Fort Worth homeowners have trusted since 1985. Our experienced team understands the precision requirements and specialized techniques that crown molding and trim painting demands, from meticulous surface preparation through final detail work that creates the clean lines and flawless finish that makes architectural elements appear professionally executed and elegantly sophisticated. We work with you to select colors and finishes that enhance your home's unique character while ensuring long-lasting results that protect your investment in these beautiful architectural details. Contact Hutch'N'Son Painting today to schedule your consultation and discover how expert crown molding and trim painting can elevate your home's interior elegance to the level of refinement and quality your family deserves.
By Nikolle Bauder October 20, 2025
Texas summers present unique challenges for homeowners throughout the Dallas-Fort Worth area, with scorching temperatures, intense humidity fluctuations, and aggressive air conditioning cycles creating the perfect storm of conditions that can wreak havoc on interior paint surfaces. While most homeowners expect exterior paint to face weather-related challenges, many are surprised to discover that interior paint cracking often becomes most pronounced during the hottest months of the year when indoor climate control systems work overtime to maintain comfortable living conditions. Understanding why interior paint develops cracks during summer months—and more importantly, how to prevent and address these issues—can save Plano, McKinney, and Frisco homeowners significant frustration and expense while maintaining the beautiful interior spaces that make Texas homes comfortable retreats from the relentless summer heat. The science behind summer paint cracking involves complex interactions between temperature fluctuations, humidity changes, substrate movement, and the physical properties of paint films that many homeowners never consider when admiring their freshly painted walls during mild spring weather. Paint essentially functions as a flexible membrane designed to expand and contract with the surfaces it covers, but extreme conditions can push these materials beyond their elastic limits, causing the film to crack, split, or separate from the substrate underneath. During Texas summers, interior walls experience dramatic temperature swings as air conditioning systems cycle on and off, outdoor heat radiates through building materials, and humidity levels fluctuate wildly between the dry conditions created by cooling systems and the moisture introduced when doors open to the humid exterior environment. Temperature differential stress represents one of the primary culprits behind summer paint cracking, particularly in homes where aggressive air conditioning creates significant temperature variations between interior and exterior wall surfaces. When the outside temperature soars above 100 degrees while indoor thermostats maintain 72-degree comfort levels, the temperature differential across wall assemblies can exceed 30 degrees, causing building materials to expand and contract at different rates. Drywall, wood framing, and exterior sheathing all respond differently to these temperature changes, creating internal stresses that can cause paint films to crack along stress concentration points such as joints, corners, and areas where different materials meet. This phenomenon becomes particularly pronounced in newer homes where building materials haven't had time to fully acclimate and stabilize, though older homes with aged paint systems can prove equally vulnerable when existing films have lost their elasticity over time. Humidity fluctuations during Texas summers create additional stress on interior paint systems through the constant moisture absorption and release cycles that cause substrate materials to swell and shrink repeatedly throughout each day. Air conditioning systems remove moisture from indoor air, creating artificially dry conditions that can cause wooden substrates to shrink and pull away from paint films. However, when humidity spikes during afternoon thunderstorms or when exterior doors open frequently, rapid moisture absorption can cause these same materials to swell quickly, stressing paint films that may have become brittle during dry periods. This constant expansion and contraction cycle proves particularly damaging to paint films that were applied during cooler months when materials were in different dimensional states, creating mismatches between substrate size and paint film capacity that manifest as cracking when summer conditions arrive. Air conditioning system effects on interior paint extend beyond simple temperature and humidity control to encompass the mechanical stress created by rapid air movement, pressure differentials, and the dramatic environmental changes that occur when systems cycle on and off throughout the day. Central air systems create positive and negative pressure zones within homes that can cause walls to flex slightly, particularly in homes with large open floor plans where air pressure changes can affect entire wall assemblies simultaneously. Additionally, the rapid temperature changes that occur when cold air from vents hits warm wall surfaces can create localized thermal shock that proves particularly damaging to paint films that have lost flexibility due to age or poor quality formulations. Homes with insufficient insulation or air sealing often experience the most severe paint cracking because temperature and humidity fluctuations penetrate deeper into wall assemblies, affecting paint adhesion and substrate stability. Substrate movement during summer months affects paint integrity through the natural expansion and contraction of building materials responding to temperature and humidity changes, with different materials moving at different rates and creating internal stresses that paint films must accommodate or risk failure. Wood components including framing lumber, trim, and cabinets expand and contract significantly with moisture changes, often pulling away from adjacent materials and creating gaps that stress paint films beyond their elastic capacity. Drywall responds more slowly to environmental changes than wood but can develop internal stresses as moisture content fluctuates, particularly around poorly sealed joints where air infiltration allows direct contact between unconditioned air and substrate materials. Metal components including ductwork, electrical boxes, and structural elements expand and contract with temperature changes, often at rates that differ dramatically from surrounding materials and create stress concentration points where paint cracking typically begins. Poor paint quality and application issues become most apparent during summer stress testing when inferior products or inadequate surface preparation reveal their limitations through premature failure patterns that would remain hidden under less demanding conditions. Low-quality paints often contain insufficient binder resins to maintain flexibility under stress, causing them to become brittle and crack when subjected to the expansion and contraction cycles common during Texas summers. Similarly, paint applied over inadequately prepared surfaces—including residual dirt, grease, or previous paint that wasn't properly adhered—often fails during summer months when substrates move and reveal poor adhesion that seemed adequate during initial application. Rushed application during inappropriate weather conditions also contributes to summer failures, particularly when paint was applied during high humidity or extreme temperatures that prevented proper curing and film formation. Inadequate surface preparation represents a leading cause of summer paint failures that could have been prevented through proper planning and execution during the initial painting process. Surfaces that weren't thoroughly cleaned, properly primed, or adequately sanded often appear acceptable immediately after painting but develop adhesion problems when stressed by summer conditions. Oil residues from cooking, smoke deposits, and general household contaminants can prevent proper paint adhesion, creating weak bonds that fail when thermal cycling stresses the interface between paint and substrate. Similarly, glossy surfaces that weren't adequately abraded often lose their paint coatings during summer months when expansion and contraction reveal that mechanical adhesion was insufficient to maintain the bond under stress. Previous paint layers that were incompatible with new coatings—such as latex over oil-based paints without proper primers—often fail dramatically during summer months when temperature cycling causes the different paint chemistries to respond differently and separate from each other. Timing and environmental factors during original paint application significantly influence how well paint systems perform during subsequent summer stress cycles, with optimal application conditions becoming crucial for long-term performance in challenging Texas climate conditions. Paint applied during high humidity conditions often traps moisture within the film structure, creating weak points that become apparent when summer heat causes rapid moisture expansion and film failure. Similarly, paint applied during extreme temperatures—either too hot or too cold—may not cure properly, resulting in films that lack the flexibility and adhesion necessary to withstand seasonal movement. Proper application timing requires consideration of both immediate weather conditions and the anticipated seasonal stress cycles the paint will experience, with fall and spring application often providing optimal conditions for paint systems that will face summer challenges. Prevention strategies for summer paint cracking begin with understanding that paint system durability depends far more on proper preparation, quality materials, and appropriate application techniques than on simply applying multiple coats of any available paint during convenient timing. Surface preparation must address all potential adhesion problems including cleaning, sanding, priming, and ensuring complete dryness before any paint application begins. This preparation becomes particularly crucial for areas prone to cracking including ceiling and wall joints, corners where different materials meet, and areas around windows and doors where thermal cycling creates the most significant substrate movement. Quality primer selection proves essential for bridging the gap between substrate materials and finish coats, with specialized primers designed to handle substrate movement while providing superior adhesion for topcoats. Paint quality selection should prioritize products formulated specifically for interior applications in challenging climates, with attention to flexibility, adhesion properties, and resistance to temperature and humidity cycling. Premium acrylic latex paints typically offer superior flexibility and durability compared to builder-grade alternatives, maintaining their elastic properties longer and handling substrate movement without cracking. Additionally, paint systems designed for high-performance applications often include specialized additives that improve flexibility, adhesion, and resistance to environmental stress, making them worthwhile investments for homes in demanding climate conditions like those found throughout North Texas. Climate control strategies within homes can significantly reduce the environmental stress that causes summer paint cracking by minimizing the dramatic temperature and humidity fluctuations that stress paint films beyond their elastic limits. Consistent thermostat settings that avoid dramatic temperature swings help reduce the thermal cycling that causes substrate movement and paint stress. Similarly, appropriate humidity control through whole-house humidification or dehumidification systems can minimize the moisture-related expansion and contraction that contributes to paint failure. Proper insulation and air sealing reduce the transfer of exterior temperature and humidity conditions to interior wall assemblies, protecting both substrates and paint films from environmental extremes. Professional application techniques become crucial for creating paint systems capable of withstanding summer stress cycles, with proper methods ensuring optimal adhesion, appropriate film thickness, and uniform coverage that performs consistently under demanding conditions. Multiple thin coats typically outperform single thick applications by providing better adhesion between layers and reducing internal stress within the paint film. Proper brushing and rolling techniques ensure complete surface coverage and adequate penetration into substrate textures, while appropriate drying time between coats allows each layer to cure properly before additional stress is applied. Professional painters understand these technical requirements and possess the experience necessary to identify potential problem areas and address them before they become failure points. Identification and early intervention for developing paint problems can prevent minor issues from becoming major failures requiring complete repainting, particularly when caught before summer stress cycles cause widespread damage. Small cracks that appear during spring months often indicate areas where paint systems are beginning to fail and will likely worsen during summer conditions unless addressed promptly. Proper evaluation requires understanding whether cracks indicate paint film failure, substrate movement, or underlying moisture problems that must be resolved before any cosmetic repairs can provide lasting solutions. Professional assessment can distinguish between surface crazing that requires only topcoat renewal and deeper adhesion failures that necessitate complete removal and reapplication. Repair techniques for existing paint cracks must address underlying causes rather than simply covering visible symptoms, ensuring that repairs remain effective through subsequent summer stress cycles. Surface preparation for crack repair often requires removing loose paint, cleaning and priming exposed substrate, and applying flexible caulk compounds to accommodate ongoing movement in areas where different materials meet. Quality repair materials including paintable caulks, primers designed for adhesion over previous coatings, and topcoats that match existing paint systems ensure that repaired areas perform as well as surrounding surfaces. Rushed repairs that skip proper preparation steps often fail quickly and may actually worsen underlying problems by trapping moisture or creating new stress concentration points. Maintenance scheduling should anticipate the seasonal stress cycles that affect interior paint systems, with preventive maintenance performed before summer conditions create the most demanding environment for paint performance. Spring inspection and touch-up of minor problems can prevent summer failures, while fall assessment after summer stress cycles can identify areas requiring attention before winter conditions create different challenges. Regular maintenance including gentle cleaning, inspection of high-stress areas, and prompt attention to developing problems helps extend paint system life and maintains the beautiful interior environments that make homes comfortable and appealing. Long-term planning for interior paint systems should consider the cumulative effects of repeated summer stress cycles on paint performance, with realistic expectations about paint life and scheduled renewal before failure occurs. Quality paint systems properly applied and maintained can withstand many summer cycles, but even premium materials eventually lose their flexibility and adhesion properties, requiring renewal to maintain protection and appearance. Planning for periodic repainting as part of regular home maintenance helps ensure that paint systems receive attention before failures create more extensive and expensive problems. When summer arrives and you notice the first signs of interior paint cracking, or when you want to prevent these issues with properly planned and executed paint systems designed to withstand Texas heat, Hutch'N'Son Painting brings the expertise and commitment to quality that Dallas-Fort Worth homeowners have trusted since 1985. Our comprehensive approach to interior painting includes thorough surface preparation that addresses potential failure points, selection of premium materials formulated for challenging climate conditions, and professional application techniques that create durable paint systems capable of handling seasonal stress cycles. We understand the unique challenges Texas summers present for interior paint systems and provide the detailed preparation and quality execution necessary to prevent the cracking problems that frustrate homeowners throughout the region. Contact us today to schedule your consultation and discover how proper planning and professional execution can protect your interior paint investment from summer stress and maintain the beautiful interior spaces in your home.
By Nikolle Bauder October 14, 2025
If you own a home in Dallas built before 1978, there's a significant possibility that lead-based paint lurks beneath layers of newer paint throughout your house. This reality affects thousands of homeowners across the Dallas-Fort Worth metroplex, where charming older neighborhoods like Lakewood, Kessler Park, and East Dallas contain beautiful homes that predate federal lead paint regulations. Understanding how to safely manage lead paint while achieving your decorating goals requires knowledge, planning, and often professional expertise to protect your family's health and comply with federal regulations. The presence of lead paint in your home doesn't automatically create a health emergency, but it does require careful consideration before undertaking any painting or renovation projects. Lead paint that remains intact and in good condition typically poses minimal risk to occupants. However, disturbing lead paint through scraping, sanding, or demolition can create dangerous lead dust that poses serious health risks, particularly to children and pregnant women. This means that the simple act of repainting your home becomes a complex decision requiring careful evaluation and proper safety protocols. Many Dallas homeowners discover lead paint issues when they're ready to refresh their home's appearance or prepare for a major renovation. The good news is that you can absolutely paint over lead paint safely when proper procedures are followed. In fact, encapsulation through painting represents one of the most cost-effective and practical solutions for managing lead paint in older homes. However, success depends on understanding when encapsulation is appropriate, how to execute it properly, and when professional intervention becomes necessary. Understanding Lead Paint in Dallas-Area Homes Lead-based paint was widely used in American homes until its ban for residential use in 1978, meaning any home built before this date potentially contains lead paint. In Dallas, this encompasses a substantial portion of the housing stock, including historic neighborhoods that define much of the city's character. The older your home, the higher the likelihood and concentration of lead paint, with homes built before 1950 having an extremely high probability of containing lead-based paint throughout both interior and exterior surfaces. Lead paint doesn't look different from regular paint, and you cannot determine its presence through visual inspection alone. Professional testing is the only reliable way to confirm whether your home contains lead-based paint. This testing can be performed through do-it-yourself test kits available at hardware stores, though these provide only preliminary results, or through professional lead inspections that offer comprehensive analysis and documentation required for certain renovation projects. The Environmental Protection Agency requires that contractors working on homes built before 1978 follow specific lead-safe work practices, known as the RRP (Renovation, Repair, and Painting) Rule. This regulation affects any renovation project that disturbs more than six square feet of painted surface in a room or more than twenty square feet on exterior surfaces. Understanding these requirements helps homeowners recognize when professional intervention becomes legally necessary rather than simply advisable. Lead contamination in Dallas homes often concentrates in specific areas where paint experiences the most wear and friction. Windows and door frames represent high-risk areas because the constant opening and closing creates friction that generates lead dust. Stairs, railings, and trim work also show elevated lead levels due to frequent contact and wear. Exterior surfaces, particularly those facing south and west, may have higher lead concentrations due to multiple paint layers applied over decades of weather protection. Health Risks and Safety Considerations Lead exposure poses serious health risks that make proper handling of lead paint crucial for protecting your family. Children under six years old face the greatest danger because their developing nervous systems are particularly vulnerable to lead's toxic effects. Even small amounts of lead exposure can cause learning disabilities, behavioral problems, and developmental delays that may persist throughout a child's life. Pregnant women must also exercise extreme caution, as lead exposure can affect fetal development and cause complications during pregnancy. Adults aren't immune to lead's health effects, though they generally require higher exposure levels to experience symptoms. Lead poisoning in adults can cause high blood pressure, kidney problems, reproductive issues, and memory difficulties. For Dallas homeowners planning renovation projects, understanding these risks helps prioritize safety measures and professional consultation when working around potential lead paint. Lead dust represents the primary exposure pathway in homes with lead paint. This invisible hazard can contaminate household surfaces, carpets, and even clothing when lead paint is disturbed through renovation activities. Normal cleaning methods don't effectively remove lead dust, requiring specialized cleaning techniques and equipment to ensure safe removal. This is why proper containment and cleanup become critical components of any project involving potential lead paint disturbance. The good news is that lead paint in good condition poses minimal immediate risk. Paint that remains intact and well-adhered doesn't release lead dust under normal circumstances. However, peeling, chipping, or chalking paint creates immediate hazards that require prompt attention. Additionally, any renovation activity that could disturb lead paint transforms a stable situation into a potential health emergency without proper precautions. When You Can Safely Paint Over Lead Paint Encapsulation through painting represents an EPA-approved method for managing lead paint when specific conditions are met. This approach covers lead paint with new layers that prevent lead dust release while providing the fresh appearance homeowners seek. However, encapsulation isn't appropriate for all situations and requires careful evaluation of surface conditions and proper execution to ensure effectiveness. The underlying lead paint must be in good condition for encapsulation to work properly. This means the surface should be stable, well-adhered, and free from peeling, chipping, or chalking. Any areas showing paint failure must be addressed before encapsulation, but this remediation must follow lead-safe work practices to prevent contamination. Professional assessment helps determine whether your specific surfaces qualify for encapsulation or require more extensive remediation. Surface preparation for encapsulation differs significantly from standard painting preparation. While regular painting projects might involve sanding or scraping to create smooth surfaces, lead paint encapsulation requires minimal disturbance to avoid creating lead dust. Instead, preparation focuses on cleaning with appropriate methods, making minor repairs using lead-safe techniques, and ensuring surfaces are sound enough to support new paint layers. The paint products used for encapsulation must meet specific performance standards to ensure they provide adequate barriers between lead paint and living spaces. Standard wall paint isn't sufficient for lead paint encapsulation. Instead, specialized encapsulant coatings are designed to create durable, long-lasting barriers that prevent lead dust release even if the coating experiences minor damage. These products typically cost more than regular paint but provide the performance necessary for safe lead paint management. Professional application often makes the difference between successful encapsulation and failed attempts that create more problems than they solve. Contractors certified in lead-safe work practices understand the specific techniques required for encapsulation, including proper surface preparation, product selection, application methods, and cleanup procedures that prevent lead contamination during the process. Situations Requiring Professional Lead Abatement While encapsulation works well for stable lead paint, certain conditions require complete lead paint removal through professional abatement. Paint that's extensively deteriorated, surfaces subject to high wear or friction, and areas where encapsulation isn't practical need professional intervention. Attempting to handle these situations without proper training and equipment creates serious health risks and potential legal liability. Friction surfaces like window sashes, door frames, and stair treads typically require abatement rather than encapsulation because the constant movement and contact will eventually wear through encapsulant coatings, exposing the lead paint underneath. These areas need complete lead paint removal to ensure long-term safety. Professional abatement contractors have specialized tools and techniques for safely removing lead paint from these challenging surfaces. Extensively damaged surfaces with widespread peeling, chalking, or flaking lead paint aren't candidates for encapsulation. Attempting to paint over severely deteriorated lead paint won't provide adequate protection and may actually make the problem worse by creating false confidence while lead hazards persist. These situations require complete paint removal and surface restoration before new paint application. Water damage that affects lead-painted surfaces often necessitates professional abatement because moisture compromises paint adhesion and can cause extensive lead paint failure. Dallas homes that have experienced roof leaks, plumbing failures, or flooding may have widespread lead paint damage that encapsulation cannot address effectively. Professional assessment helps determine the extent of damage and appropriate remediation approaches. Renovation projects that involve structural changes, major demolition, or extensive surface disturbance trigger federal RRP requirements that mandate certified contractor involvement. These regulations aren't suggestions—they're legal requirements with significant penalties for non-compliance. Homeowners who attempt major renovation projects involving lead paint without proper certifications and procedures face potential fines and liability for any contamination that results. Legal Requirements and Compliance Federal law requires specific disclosures and procedures when dealing with lead paint in residential properties. The Lead Disclosure Rule mandates that sellers and landlords inform buyers and tenants about known lead paint hazards before sale or lease. This means that if you know your home contains lead paint, you must disclose this information to potential buyers when you eventually sell. The RRP Rule requires that contractors working on homes built before 1978 be certified in lead-safe work practices and follow specific procedures to prevent lead contamination. This applies to any renovation project that disturbs painted surfaces beyond minimal thresholds. Homeowners can perform their own work on their own residences without certification, but they must follow the same safety procedures and are liable for any contamination that results. Documentation becomes important for both compliance and future reference. Professional lead testing provides official documentation of lead paint presence or absence that satisfies disclosure requirements and helps plan future renovation projects. Similarly, professional abatement or encapsulation work should be thoroughly documented to demonstrate compliance with regulations and provide records for future homeowners. Local Dallas building codes may impose additional requirements beyond federal regulations, particularly for properties in historic districts or those undergoing major renovations. Checking with local building officials before beginning lead paint work ensures compliance with all applicable regulations and helps avoid complications during permit reviews or inspections. Practical Steps for Dallas Homeowners If you suspect your Dallas home contains lead paint, start with professional testing to confirm its presence and extent. This investment provides the information necessary to make informed decisions about renovation projects and helps prioritize areas that need immediate attention versus those that can be managed through routine maintenance. Develop a long-term management plan that addresses lead paint hazards while meeting your family's needs for home improvements and maintenance. This plan might include immediate encapsulation of high-risk areas, scheduling professional abatement for surfaces that require it, and establishing maintenance procedures that prevent lead paint deterioration over time. Choose qualified professionals for any work involving confirmed or suspected lead paint. Verify that contractors hold appropriate certifications, carry adequate insurance, and have experience with lead paint projects. The lowest bid isn't necessarily the best value when safety and legal compliance are at stake. Establish ongoing maintenance procedures that protect encapsulated lead paint and prevent future hazards. This includes regular inspection of painted surfaces, prompt repair of any damage that exposes underlying layers, and careful planning of future renovation projects to maintain compliance with lead safety requirements. Cost Considerations and Planning Lead paint management costs vary significantly depending on the approach chosen and the extent of work required. Simple encapsulation projects may cost only modestly more than standard painting, while comprehensive abatement can represent major investment. However, the costs of not addressing lead hazards—including potential health impacts and legal liability—often exceed the investment in proper remediation. Professional testing costs typically range from a few hundred to over a thousand dollars depending on home size and the extent of testing required. This upfront investment provides crucial information for planning all future renovation work and may identify priority areas that need immediate attention to protect family health. Encapsulation projects generally cost 25-50% more than standard painting due to specialized materials and procedures required. Professional abatement costs significantly more but may be necessary for certain surfaces or extensive lead paint problems. Getting multiple quotes from certified contractors helps establish realistic budgets and ensures competitive pricing. Insurance considerations affect both the cost and planning of lead paint work. Some homeowner's insurance policies exclude coverage for lead contamination, making professional execution even more important to prevent problems that could result in expensive cleanup and potential health claims. Verify your coverage and consider additional protection if significant lead paint work is planned. Making Informed Decisions Managing lead paint in older Dallas homes requires balancing safety, compliance, aesthetics, and budget considerations. The key lies in professional assessment that provides accurate information about your specific situation, followed by careful planning that addresses immediate risks while supporting long-term home improvement goals. Remember that lead paint isn't an emergency if it's in good condition, but it becomes a serious hazard when disturbed improperly. Taking time to understand your options, obtain professional consultation, and plan work carefully prevents both health risks and unnecessary expenses while achieving your goals for your home's appearance and safety. Ready to address lead paint concerns in your Dallas-area home safely and effectively? Hutch'N'Son Painting has served the Dallas-Fort Worth metroplex since 1985, with extensive experience in lead-safe work practices and specialized techniques for managing lead paint in older homes. Our certified professionals can assess your specific situation, explain your options, and execute appropriate solutions that protect your family while achieving your aesthetic goals. We understand the unique challenges of Dallas-area homes built before 1978 and provide the expertise necessary to navigate federal regulations while delivering the quality results you expect. Contact us today to schedule your consultation and discover how we can help you safely manage lead paint while transforming your home's appearance.
Show More