Chipping, Yellowing, Peeling: What Your Kitchen Cabinets Are Telling You About the Paint Job Underneath

Nikolle Bauder • April 9, 2026

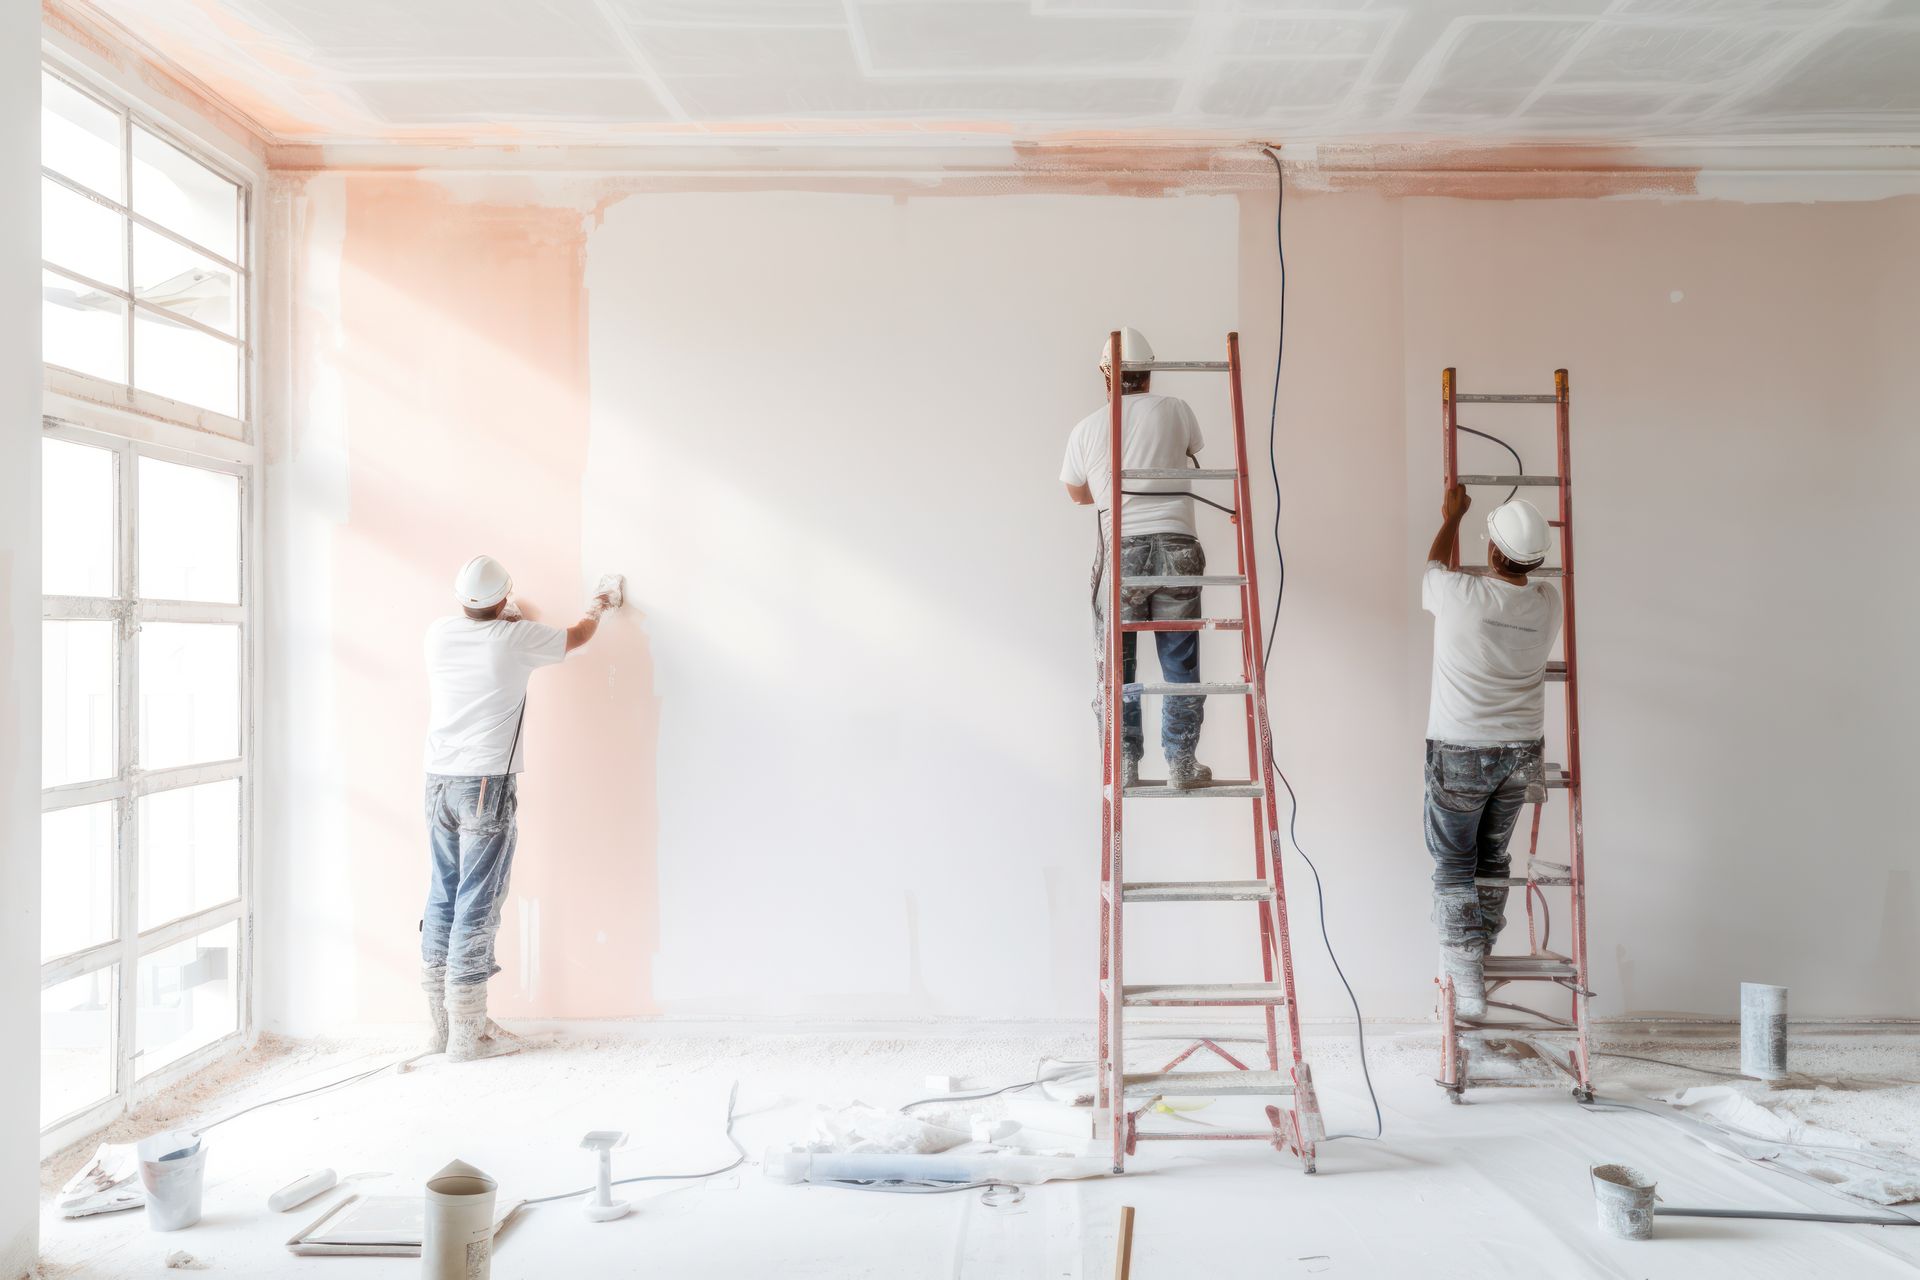
Cabinet painting is one of the most popular interior investments homeowners in Plano, Frisco, Richardson, Allen, McKinney, and across the greater Dallas-Fort Worth area make — and for good reason. At a fraction of the cost of full cabinet replacement, professionally painted cabinets can transform a dated kitchen into something that looks completely current. But it is also one of the more technically demanding painting projects in a residential home, and the failure rate on improperly executed cabinet paint jobs is high enough that many homeowners who have had cabinets painted before have had the experience of watching that investment begin to deteriorate within a year or two.


Chipping at door edges and hardware locations. Yellowing of white or light-colored paint that shifts perceptibly toward ivory or cream within a few years. Peeling that starts at corner joints and progresses inward. These are the failure patterns that cabinet paint homeowners in DFW encounter most frequently, and each of them is telling a specific story about what went wrong at the preparation or product selection stage — not about the inherent limitations of cabinet painting as a concept. Painted cabinets done correctly in a DFW kitchen last seven to ten years before requiring refinishing. Painted cabinets done incorrectly can look compromised within six months.


Understanding what each failure mode indicates, how the specific conditions of a Dallas-Fort Worth kitchen accelerate certain types of deterioration, and what the preparation and product decisions that prevent those failures actually look like is what gives homeowners the information they need to evaluate whether a cabinet painting proposal is genuinely going to hold up — or whether it's going to produce the same disappointing result they've already experienced.


Why DFW Kitchens Are Harder on Cabinet Paint Than Most


Before getting into the specific failure modes, it helps to understand what makes a North Texas kitchen a particularly demanding environment for cabinet coatings. This isn't a generalization — the specific climate conditions of the Dallas-Fort Worth area create thermal and humidity stress profiles that are genuinely more challenging for cabinet paint than what most of the national cabinet painting guidance assumes.


North Texas kitchens experience wide indoor humidity swings driven by the region's dramatic seasonal weather cycles. During the heating months, interior humidity can drop to 20 to 30 percent as forced air heating systems run continuously in dry winter conditions. During the summer months — when outdoor humidity is elevated and kitchens add steam and cooking moisture on top of the ambient humidity — that same space may exceed 60 to 70 percent relative humidity during active cooking periods. Wood cabinet boxes and doors absorb and release moisture in response to these swings, expanding slightly in humid periods and contracting in dry ones. Paint films bonded to those cabinet surfaces must accommodate this dimensional movement or they crack, lift at edges, and eventually fail.


DFW's intense UV exposure through kitchen windows adds another layer of stress specific to this market. South and west-facing kitchens in Plano and Frisco receive direct afternoon sun that creates surface temperatures on cabinet doors well above ambient room temperature, and sustained UV exposure drives the yellowing process in white alkyd and oil-based finishes at a rate that homeowners in less sun-intense markets never encounter to the same degree.


Add to these environmental factors the specific chemical exposure of a functioning kitchen — cooking grease that aerosolizes and deposits on every surface within several feet of the cooktop, alkaline cleaning products used daily on cabinet surfaces, and the mechanical abrasion of handles being gripped and cabinet doors being opened and closed hundreds of times per week — and you have a surface environment that exposes every weakness in a paint system within a relatively short timeframe.


Chipping: The Failure Mode That Starts at Hardware and Edges


Chipping is the failure mode most immediately visible on painted cabinets, and it concentrates at specific locations for specific reasons. The areas that chip first are almost always the same: directly behind door and drawer hardware where fingers grip the surface with every use, at the edges of door and drawer faces where the paint wraps around to the side of the panel, and at the corners of frame-and-panel doors where two painted surfaces meet at a sharp angle.


These locations share a common characteristic: they are the points of highest mechanical stress on the painted surface. Hardware locations receive concentrated finger pressure and occasional impact from rings, bracelets, and the hardware itself backing into the painted surface. Edge locations receive impact from adjacent cabinet doors and drawers closing against them. Corner locations on frame-and-panel doors concentrate paint film stress at the geometry where two planes meet.


Chipping at these locations almost always traces back to one of two preparation failures, and frequently both simultaneously. The first is insufficient surface scuffing and deglossing before painting. Cabinet surfaces — whether they are previously painted, stained and varnished, or factory-finished — are typically very smooth and have low surface energy that makes it difficult for new paint to form a strong adhesive bond without mechanical preparation. Painting over a smooth, previously finished cabinet surface without thorough scuff sanding leaves the new paint with bond strength that seems adequate initially but fails under the repeated mechanical stress of normal kitchen use.


The second preparation failure is inadequate priming — specifically, the use of standard interior latex primer rather than a high-adhesion bonding primer formulated for previously finished surfaces. Standard latex primers are designed for drywall and bare wood, where their penetration depth and adhesion chemistry perform as intended. On a previously finished cabinet surface, they sit on top of the existing finish rather than penetrating into it, creating a primer layer with bond strength to the underlying surface that is marginally better than the topcoat alone would have achieved. A dedicated bonding primer — products formulated with adhesion promoters specifically for use over glossy and previously finished substrates — creates a chemical and mechanical bond that dramatically outperforms standard primers under the mechanical stress kitchen hardware locations generate.


Yellowing: The Chemistry Behind White Cabinets That Don't Stay White


Yellowing of white painted cabinets is the failure mode that surprises homeowners most, because white paint going yellow seems like a product quality problem rather than an application or product selection problem. The mechanism behind it is specific and preventable, and understanding it explains why some white cabinet paint jobs stay crisp for years while others shift perceptibly within twelve to eighteen months.


The primary cause of yellowing in kitchen cabinet finishes is the use of alkyd or oil-modified resin systems in environments with insufficient UV exposure. Alkyd resins — which are a component of many high-performance cabinet finishes because of the hard, smooth film they produce — undergo an oxidation reaction in low-light conditions that produces yellowing compounds in the film. This is sometimes called "ambering" or "yellowing in the dark," and it is why cabinets inside closed pantries or on the interior-facing sides of cabinet doors yellow faster than the exterior faces that receive ambient light.


In DFW kitchens with significant UV exposure from south and west-facing windows, the UV actually slows the yellowing mechanism in alkyd systems — which is why cabinet doors that face windows often yellow less than those on shaded walls. But those same UV-exposed doors then face accelerated binder degradation from the UV intensity that DFW delivers, creating a different failure pathway on the sun-exposed surfaces.


The product solution for white and light-colored cabinets in North Texas kitchens is a waterborne alkyd or acrylic urethane formulation rather than traditional oil-based or pure alkyd products. Waterborne alkyds — products like Benjamin Moore Advance and Sherwin-Williams Emerald Urethane Trim Enamel — cure to a very hard, smooth film similar to traditional alkyd but without the oil-based binder that drives the yellowing chemistry. They maintain white and light colors significantly better over time, particularly in the low-light interior cabinet environments where yellowing concentrates, and they are the professional standard for light-colored cabinet painting in markets like DFW where UV and heat exposure make the performance of every coating decision visible within a relatively short timeframe.


Peeling: What Delamination Is Actually Telling You


Peeling on painted cabinets — where the paint lifts away from the surface in sheets or patches, sometimes pulling primer with it — is the most severe failure mode and the one with the clearest diagnosis: the adhesion between the paint system and the substrate was never properly established. Peeling doesn't develop out of thin air years after a good adhesion foundation — it develops when the adhesion foundation was inadequate from the beginning and the stress of kitchen conditions over time has exploited that weakness to the point of visible failure.


The most common adhesion failure scenario on repainted DFW cabinets involves painting over a previously painted or varnished surface without adequately removing the existing finish first. Many kitchen cabinet surfaces carry factory conversion varnish finishes — the catalyzed, two-component coatings that furniture and cabinet manufacturers apply at the factory because of their exceptional hardness and chemical resistance. These finishes are genuinely difficult to paint over without either removing them mechanically or chemically etching them before primer application, because their hardness and low surface energy resist adhesion from standard primer systems.


Homeowners and painting contractors who sand lightly and prime without fully addressing a conversion varnish surface create an adhesion system where the primer is bonded to a hard, slick factory finish rather than to the wood substrate. That factory finish, under the thermal and chemical stress of a DFW kitchen, eventually releases from the wood below the paint system — and when it does, it takes the entire paint system above it along with it in the delamination pattern that homeowners recognize as peeling. The correct solution for conversion varnish cabinets is either mechanical removal with sanding to bare wood or chemical etching with a product specifically formulated to prepare conversion varnish surfaces for repainting — neither of which is a shortcut-friendly process, but both of which produce adhesion foundations that hold.


The Prep Protocol That Determines Whether Your Cabinet Paint Job Lasts


Given the specific failure modes and their causes, the preparation protocol for a DFW kitchen cabinet paint job that will genuinely hold for seven to ten years is more involved than a light sanding and a coat of primer. It begins with the cleaning step that most DIY and budget cabinet painting projects skip entirely: a thorough degreasing of every cabinet surface with TSP or a dedicated degreaser that removes the cooking grease film that has accumulated on every surface within reach of the cooktop, regardless of whether it's visible. This degreasing step removes the contamination layer that prevents primer adhesion at a molecular level and that produces the localized adhesion failures — the flat, dull patches and the early chipping at hardware zones — that show up within the first year on inadequately prepared cabinets.


After degreasing, thorough mechanical scuffing with 150 to 180 grit paper creates the surface profile that allows bonding primer to grip. Hardware removal before sanding, rather than masking around it, exposes every surface that will receive paint rather than creating a shielded zone at the highest-stress location on the door. Filling and sanding any surface damage — edge chips, corner wear, hinge screw holes that have enlarged — produces the uniformly smooth substrate that cabinet paint requires to level and cure into the smooth, hard film that kitchen use demands.


With a degreased, mechanically prepared surface, a bonding primer applied in a thin, even coat provides the adhesion foundation that every subsequent coat builds on. Two to three coats of waterborne alkyd trim enamel, applied with a fine-finish spray gun or a high-quality foam roller to achieve the smooth, hard film that brush application cannot produce on horizontal cabinet faces, completes a system that is genuinely capable of holding up to the thermal, chemical, and mechanical demands of a DFW kitchen.


Let Hutch'N'Son Deliver a Cabinet Finish That Holds Up in a Texas Kitchen


Cabinet painting done at the preparation and product standard that DFW's specific kitchen conditions demand is genuinely transformative and genuinely durable — but it requires every step of the preparation process to be executed without shortcuts, and product selection that responds to the specific failure mechanisms that North Texas heat, humidity swings, and UV intensity create. At Hutch'N'Son Painting, we've spent over forty years working in kitchens throughout Plano, Frisco, Richardson, Allen, McKinney, and the greater DFW area, and we understand exactly what cabinet paint jobs look like at year three when the prep was done right and when it wasn't. If you're ready to have your cabinets painted with the preparation discipline and product knowledge that makes this investment last, contact us today for your free estimate — and let's create a kitchen finish that stands up to everything our climate delivers.


By Nikolle Bauder April 27, 2026
Most homeowners spend the majority of their pre-project research time on finish paint — the color, the sheen, the brand, the specific formulation. The primer decision gets far less attention, often defaulting to whatever is on sale at the paint store or whatever the previous painter left behind in the garage. This priority inversion is one of the most consistent sources of preventable paint failure in residential painting, because primer is the decision that determines whether the finish coat can do what it was designed to do or whether it is being asked to perform over a foundation that cannot support it. Primer is not simply an undercoat that makes paint stick. Different primer formulations perform fundamentally different functions — sealing porous substrates, promoting adhesion on difficult surfaces, blocking stains from migrating through finish coats, and building a uniform foundation that allows topcoat color to read accurately and consistently. The primer that performs these functions correctly on one surface type performs them inadequately or not at all on a different surface type, which is why primer selection is a surface-by-surface decision rather than a product-level decision made once for an entire project. In Plano, Frisco, Richardson, Allen, McKinney, and across the greater Dallas-Fort Worth area, where North Texas's extreme UV, high summer temperatures, and the humidity cycling between the dry heating season and the humid spring and summer create stress profiles that expose every weakness in a paint system quickly, getting the primer decision right is more consequential than in moderate climates where the environment is more forgiving of marginal preparation choices. Here is what belongs on each major surface type and why. Drywall: New and Previously Painted Surfaces New drywall — the unpainted gypsum board that contractors install during construction or renovation — is one of the most porous and moisture-sensitive substrates in residential painting, and it requires specific primer treatment before finish paint for reasons that go beyond simple adhesion. The paper facing on drywall absorbs the first coat of paint applied to it at a dramatically higher rate than any subsequent coat, producing a condition called flashing — visible sheen inconsistency across the painted surface — where areas of bare paper absorbed more binder from the paint than areas with adjacent primer, leaving a dried film that reads as slightly flatter and duller at every location where paper absorption was highest. PVA primer — polyvinyl acetate, sometimes called drywall primer or new construction primer — is the correct product for new drywall because its formulation is specifically engineered to seal the paper facing and equalize the absorption rate across the entire surface before finish paint is applied. PVA primer penetrates into the paper facing, fills the microscopic pores, and creates a uniform foundation that finish paint reads from consistently — producing the even sheen, complete coverage, and color accuracy that two coats of finish paint over raw drywall often fail to achieve even with additional coats. In a DFW home where a renovation or new construction project needs to be completed efficiently, PVA primer over new drywall is the step that makes two finish coats look as good as three or four would without it. Previously painted drywall in good condition — no peeling, no staining, no significant sheen inconsistency — does not require a full prime coat before repainting if the new color is in a similar value range as the existing color and the surface has been properly cleaned. A light scuff sanding with 220-grit paper to create mechanical tooth, followed by spot priming at any repaired areas, is adequate preparation for a standard repaint on sound previously painted drywall. Where a full prime coat is warranted on previously painted drywall is when the color change is dramatic — particularly a dark-to-light transition — or when the existing paint has a high-gloss finish that needs to be chemically or mechanically dulled to provide adequate adhesion for the new system. Repaired Drywall: The Surface Where Primer Is Most Non-Negotiable Repaired drywall areas — patches made with joint compound at nail holes, larger dings and dents, corner repairs, and any area where the drywall paper has been damaged and replaced with joint compound — represent the most common primer failure point in residential interior painting, and the failure is visible every time it happens: flat, dull patches at every repair location surrounded by a properly finished wall, announcing themselves as repairs to anyone who looks at the wall under raking light. The cause of this flashing at repairs is differential absorption. Joint compound is significantly more porous than the drywall paper surrounding it, and it absorbs the binder from any paint applied directly over it far more aggressively than the paper does. Paint over unprimed joint compound produces a film that is binder-poor at the compound surface — because the compound drank the binder down into its porous structure before the film could cure — and that binder-poor film reads as flat and dull compared to the binder-rich film on the adjacent properly sealed surface. The primer that addresses this problem on repaired drywall is PVA or a dedicated sealer applied specifically over every repair location before any finish coat touches the wall. The primer penetrates the joint compound and seals it against the differential absorption that causes flashing. This spot priming step is not optional on a repainted interior wall with any repairs — it is the step that determines whether the repairs disappear into the wall or announce themselves permanently. In a DFW home where the Blackland Prairie clay soil's seasonal movement produces hairline cracking at corners and around window and door openings in most homes over time, this spot priming step is a regular requirement on virtually every interior repaint. Wood Trim: Where Adhesion and Blocking Both Matter Interior wood trim — baseboards, door casings, window casings, crown molding, and any other painted millwork — presents primer requirements that differ from drywall in two important ways. First, wood is a more chemically active substrate than drywall, with resins, tannins, and extractives that can bleed through water-based primers and topcoats and produce discoloration that appears days or weeks after painting. Second, wood trim in a DFW home experiences more dimensional movement through the extreme dry-to-humid cycling of North Texas seasons than trim in moderate climates, requiring a primer with adequate film flexibility to accommodate that movement without cracking at the primer-to-wood interface. For bare wood trim — new millwork being painted for the first time, or trim that has been stripped to bare wood for refinishing — a shellac-based primer or a high-quality oil-based wood primer applied before the finish coat addresses both the tannin bleed and the adhesion requirements simultaneously. Shellac is the more aggressive stain and bleed blocker of the two and is the appropriate choice for wood species with high tannin content — particularly for any hardwood trim like oak or walnut that is being painted rather than stained, where the tannins in the wood are aggressive enough to bleed through multiple coats of latex primer and finish without adequate blocking. On pine trim — the most common material in DFW residential construction — a quality oil-modified or shellac primer applied at end grain and any visible knots provides adequate blocking, with a latex bonding primer over the face surfaces sufficient for general adhesion. For previously painted trim in good condition — firmly adhered across the entire surface, no peeling, no lifting at edges — a light scuff sanding and spot priming at any areas where the existing finish has been compromised is adequate preparation for a trim repaint. The specific condition that requires a full prime coat on previously painted trim is a sheen change — repainting a high-gloss trim in a lower sheen, or repainting over a trim system where multiple coats have built up to a film thickness that has begun showing adhesion fatigue at high-stress locations. Stained Ceilings: The Surface Where Product Chemistry Is the Entire Answer Water-stained ceilings are the interior surface where primer selection is most consequential and where the wrong choice produces the most reliably frustrating outcome — the stain that reappears through fresh paint within weeks, sometimes looking darker than it did before the paint was applied. In DFW, where sudden intense rainstorms can overwhelm roof drainage systems and produce water intrusion events, and where HVAC systems running through long cooling seasons can develop condensation issues that stain ceiling surfaces near supply registers, water-stained ceilings are a frequent pre-painting condition that requires specific treatment. Standard latex primers — including the latex primers labeled as "stain blocking" at the consumer level — do not reliably block the water-soluble organic and mineral compounds that produce ceiling staining from migrating through a fresh paint film. The mechanism is straightforward: water-based primers introduce water to the stained surface during application, that water dissolves the water-soluble staining compounds, and as the primer dries, those dissolved compounds migrate upward through the wet film and deposit at the surface. Fresh finish paint applied over that primer inherits the same compounds, and the stain reappears. Shellac-based primer is the correct product for water-stained ceilings because it cures through solvent evaporation rather than water evaporation, introducing no water to the stained surface and therefore not mobilizing the water-soluble staining compounds. The dried shellac film is chemically impermeable to those compounds, creating a true seal that two coats of quality flat ceiling paint can be applied over without bleed-through. One coat of shellac primer applied over a properly dried stain location — after confirming that the moisture source has been resolved — produces a permanently blocked stain that does not return. Oil-based stain-blocking primers are the appropriate alternative to shellac on stained ceilings when shellac's faster dry time and stronger odor are not preferable for the project conditions. Both products share the non-water-based curing mechanism that makes them effective where latex stain blockers fail. Smoke staining on ceilings — from fireplace backdraft events, candle combustion, or cooking residue accumulation — requires the same shellac or oil-based blocking approach as water staining. The organic compounds in smoke residue are similarly water-soluble and migrate through latex-based primers in the same way, producing the yellowing and ghosting that appears through fresh ceiling paint over inadequately blocked smoke-stained surfaces. Previously Painted or Glossy Surfaces: The Adhesion Primer That Gets Overlooked There is one primer category that receives less attention in general painting guidance than it deserves for how frequently the need for it arises on typical DFW repaint projects: bonding primer for previously painted or glossy surfaces where adhesion is a genuine concern rather than a formality. Standard latex primers rely on mechanical tooth — the microscopic roughness of the substrate surface — to anchor the primer film during application and curing. On drywall and bare wood, adequate mechanical tooth is present without additional preparation. On previously painted surfaces that have been cleaned but not scuff-sanded, on factory-finished cabinetry or millwork with conversion varnish finishes, or on any surface where the existing finish is hard, smooth, and chemically resistant, standard latex primer may not develop adequate adhesion to hold through the thermal cycling and daily contact that DFW interiors impose on painted surfaces. Bonding primer — formulated with adhesion promoters that create a chemical bond with smooth, previously finished surfaces in addition to whatever mechanical tooth is available — is the correct product in these situations. On cabinet painting projects, where the existing factory finish is often harder and more chemically resistant than standard paint, bonding primer is not an optional upgrade — it is what determines whether the cabinet finish holds through the daily contact and chemical cleaning exposure of a DFW kitchen or begins chipping at hardware locations within the first year.  Let Hutch'N'Son Apply the Right Primer to Every Surface in Your Home Primer selection is the foundation of every paint project Hutch'N'Son executes in Plano, Frisco, Richardson, Allen, McKinney, and across the Dallas-Fort Worth area — because forty years of working in North Texas homes has given us a specific and detailed knowledge of what happens when the wrong primer goes on the wrong surface and what a properly primed foundation looks like when the finish coat goes on over it. We don't apply a single primer to every surface on a project and call the preparation done. We evaluate each surface type, identify the specific preparation requirement it presents, and apply the product that addresses that requirement — because the finish paint you invest in deserves a foundation that allows it to perform to its full potential. Contact our team today for your free estimate — and let's make sure every surface in your home gets the preparation it actually needs.
By Nikolle Bauder April 20, 2026
There is a pattern that repeats itself across Plano, Frisco, Richardson, Allen, McKinney, and every other established neighborhood in the Dallas-Fort Worth metroplex with enough regularity that experienced exterior painters can almost predict it from a street-level assessment. A home gets painted — often by the lowest bidder on a competitive job — and the result looks excellent for the first season. The color is right, the coverage looks complete, and the homeowner feels good about the decision. By the second spring, peeling begins at the window frames. By the third year, bubbling has appeared on the south-facing walls, the caulk at the door casings is cracking, and sections of siding that were never a problem before the paint job are showing moisture staining that wasn't there two years ago. The paint didn't fail. The preparation failed. And the paint is simply making that failure visible. This outcome is so common in the DFW market because North Texas delivers one of the most demanding exterior environments for paint coatings in the country, and that demanding environment has zero tolerance for preparation shortcuts that milder climates sometimes absorb without immediate consequence. Surface temperatures exceeding 150 degrees on south and west-facing walls in summer, freeze-thaw cycling through a North Texas winter that is less severe than Wisconsin's but still consequential for any moisture that has infiltrated a compromised joint, spring hail that impacts paint films at velocities most manufacturers don't test against, and the expansive clay soils that shift foundations and stress every caulk joint in a structure — every one of these forces exploits any weak point in the preparation system with a speed and thoroughness that makes the cost of skipped prep immediately quantifiable in years of paint life lost. Understanding what exterior preparation actually involves, how long each phase takes when done correctly, and what the specific preparation failures look like in the DFW environment is what allows homeowners to evaluate competing proposals intelligently rather than defaulting to price as the primary differentiator. What Exterior Preparation Actually Consists Of The term "prep work" covers a range of activities that vary enormously in scope and thoroughness between contractors, and the difference between a thorough preparation and a minimal one isn't always visible until the paint has been on the wall for two seasons. Breaking down what complete exterior preparation actually involves — and how long each component takes on a typical DFW home — makes the time investment make sense in concrete terms. Pressure washing is the most visible preparation step and the one most homeowners are aware of, but it is the beginning of the preparation process rather than the whole of it. Proper pressure washing of a typical 2,000 to 2,500 square foot DFW home takes two to four hours of actual washing time, followed by a drying period that in North Texas conditions during spring and fall should be at minimum 24 hours and ideally 48 hours before any coating is applied. Rushing the dry period — beginning prep work the morning after afternoon washing because the surface looks dry — is one of the most common preparation shortcuts in the market, and it is one that doesn't become visible until months later when moisture trapped between the wet substrate and the new coating migrates outward and lifts the paint film from below. After washing and adequate drying, the scraping phase addresses all loose, failing, and compromised paint on the existing surface. On a DFW home that has been previously painted and is being repainted rather than receiving a first application, this phase is where the real time investment separates thorough preparation from cursory preparation. A contractor committed to scraping every area of loose paint back to a solid, adherent edge — not just the sections that are obviously peeling, but every section that fails the adhesion test of a putty knife drawn firmly across the surface — will spend significantly longer on scraping than a contractor who addresses only the visibly deteriorated areas and calls the surface ready. This distinction is invisible from a proposal document that simply says "scrape and prepare." It is very visible two years later when the sections that weren't adequately scraped begin lifting. The Caulk Phase: The Preparation Step With the Highest Consequence-to-Time Ratio Caulking is the preparation phase that has the greatest single impact on how long an exterior paint job performs in North Texas conditions, and it is also the phase most frequently executed inadequately — not because it is technically difficult, but because doing it correctly is time-consuming and the shortcuts are invisible at inspection. Complete caulking preparation on a DFW home involves removing all existing caulk from every joint on the exterior — every window and door perimeter, every penetration through the siding, every transition between dissimilar materials — before any new caulk is applied. This removal-first protocol is what distinguishes professional exterior preparation from superficial preparation, and it is the step most frequently skipped. Applying new caulk over existing caulk that has hardened, cracked, or partially separated from the substrate creates a layered system where the new bead can only adhere as well as the old bead beneath it adheres to the substrate — which is, by definition, inadequately. The new caulk looks complete at inspection and fails within one to two DFW winter and summer cycles because it is bonded to a failing layer rather than to the actual substrate. Removing all existing caulk from a 2,000 to 2,500 square foot home with standard window and door counts takes three to five hours of dedicated work. Cleaning the joint faces after removal, allowing them to dry, and applying new siliconized acrylic caulk with proper tooling and a cure period before painting adds another four to six hours across the caulking phase. For a complete exterior preparation project, the caulk phase alone represents a full day of work — time that a contractor proposing a two-day exterior job on a standard DFW home almost certainly hasn't allocated for if the total project timeline has to accommodate that scope. Priming: The Phase That Most Exterior Proposals Treat as Optional Primer specification on an exterior painting project is where the difference between a professional preparation standard and a budget approach becomes most consequential for long-term performance, and it is the phase where the most technically significant shortcuts are taken. Not every surface on a DFW exterior requires a full prime coat before topcoat application. Sound, previously painted surfaces being coated with a compatible product at reasonable color similarity can accept topcoat directly over properly prepared existing paint. But specific conditions require primer, and identifying and addressing those conditions in the preparation phase rather than painting over them is what prevents the failures that appear within the first two years on a new paint job. Bare wood exposed by thorough scraping requires spot priming before topcoat to seal the porous substrate against moisture infiltration and to provide the film build that topcoat alone cannot deliver over raw wood in a single application. Patched areas where joint compound or filler has been used to address surface damage require priming before topcoat because joint compound absorbs paint at a different rate than the surrounding surface, and unprimed patches produce the flat, dull spots — called flashing — that appear as visible patches under raking light even when the topcoat color is uniformly correct. Water stained areas on siding or trim require stain-blocking primer before topcoat, because standard topcoat over an unblocked water stain produces a result that looks clean on application and reveals the stain through the fresh paint within weeks as the water-soluble compounds migrate upward through the wet film. In North Texas, where hail damage creates small but numerous impact marks on painted siding surfaces, and where foundation movement creates hairline cracks at corners and around openings on almost every home in the Blackland Prairie clay zone, the priming phase on a DFW home requires more surface-specific attention than a standard exterior project elsewhere demands. Mapping every hail impact, every crack, and every repaired area and ensuring each receives the correct primer treatment adds time to the preparation phase — time that the homeowner who compares a thorough proposal to a budget proposal will see as a cost difference rather than understanding it as a performance difference that shows up in years three and four rather than on day one. The Dry Time Discipline That North Texas Makes Particularly Consequential Across every phase of exterior preparation, the dry time discipline — the commitment to allowing each material adequate time to cure before the next phase begins — is the variable that separates a preparation sequence that performs as designed from one that fails at the timing weak points despite using the right materials. This dry time discipline is particularly consequential in DFW because North Texas weather creates conditions that both compress and extend dry times in ways that require active management rather than passive adherence to product-label specifications. A product label dry time is calibrated for moderate temperature and humidity conditions. In the DFW area during spring painting season — the peak exterior painting window — temperatures can swing from cool, damp mornings to hot, dry afternoons within a single day, and the dry time behavior of caulk, primer, and topcoat changes meaningfully across that swing. Caulk applied at 50 degrees in the morning may not reach adequate cure for painting by 2 pm even if the label suggests a four-hour window, while caulk applied at 80 degrees on a dry afternoon in the same week may be ready in two hours. Professional exterior painters in the DFW market who have spent years managing this variability develop judgment about when materials are actually ready for the next phase rather than when the clock says they should be, and that judgment translates into preparation sequences that hold up versus ones that look complete but have embedded timing failures that surface over the following seasons. What a Proper Exterior Prep Timeline Looks Like on a DFW Home For a typical 2,000 to 2,500 square foot single-story home in Plano, Frisco, Richardson, Allen, or McKinney, the preparation phase of a professionally executed exterior painting project takes two to three full working days before a topcoat is applied to any surface. This timeline accounts for pressure washing and dry time, complete scraping, caulk removal and replacement with adequate cure time, spot priming and stain blocking at every location that requires it, and a final surface inspection before the first topcoat is committed. A proposal for the same home that anticipates total project completion in two days — which is the timeline many budget exterior proposals in the DFW market are built around — mathematically cannot have allocated the preparation time that the work described above requires. The time has to come from somewhere, and it comes from the preparation phases that don't show up in finished photographs and aren't visible at project completion. They show up at year two and year three, when the homeowner is back to square one on a paint investment that should have lasted eight. Hutch'N'Son Doesn't Cut Corners on Prep 35+ years of painting homes throughout Plano, Frisco, Richardson, Allen, McKinney, and the greater Dallas-Fort Worth area has given the Hutch'N'Son team a specific and detailed knowledge of what exterior preparation shortcuts look like at year two and year three — because we're often the crew called to repaint the homes where they happened. Our exterior project timelines are built around what the preparation actually requires in North Texas conditions, not around a price point that makes the proposal win the comparison. If you're planning an exterior painting project and want a straight, honest assessment of what your home's exterior actually needs — including what the preparation phase involves and why it takes as long as it does — contact our team today to schedule your free estimate. Let's talk about your home specifically, and let's build a preparation foundation that makes the paint job you invest in this season last the way it's supposed to.
By Nikolle Bauder April 2, 2026
The deck behind your Plano, Frisco, Allen, McKinney, or Richardson home takes more sustained abuse per square foot than any other surface you own. It sits in full sun through a Texas summer that delivers surface temperatures pushing 160 degrees on a clear July afternoon. It endures the hail and wind-driven rain of spring storm systems that roll through DFW with more frequency and intensity than most homeowners realize. It absorbs and releases moisture through cycles that swing from dry, cracked soil during drought periods to saturated clay during heavy rain events. And it does all of this while bearing foot traffic, furniture weight, grills, and outdoor equipment day after day through a climate that tests every coating system to its limits. When a deck in North Texas needs to be refinished — whether because the existing finish has failed, because the wood is new and needs its first protective treatment, or because years of weathering have left the boards gray and rough — the first decision is whether to paint or stain. This question gets answered by most homeowners based on color preference or because a previous owner set a precedent. It should be answered based on what Texas heat, UV intensity, and moisture cycling actually do to each type of finish over time, because the performance difference between deck paint and deck stain on a DFW deck is significant enough that choosing the wrong option means redoing the project in two years rather than six. The Fundamental Difference Between Paint and Stain on a Deck Surface Deck paint and deck stain are not simply aesthetic variations of the same product category — they are chemically and structurally different systems that interact with wood and with weather in fundamentally different ways. Understanding that difference is what makes the performance comparison meaningful rather than a matter of opinion. Deck paint forms a surface film on top of the wood, similar to how interior wall paint creates a film on drywall. The paint film is continuous, opaque, and sits on the surface of the wood rather than within it. This film approach has one significant advantage: it completely obscures the wood's surface condition, making deck paint the appropriate choice for decks where the wood has weathered significantly, shows grain checking or surface roughness, or simply needs its color and condition masked rather than enhanced. It also delivers the most consistent color results across wood surfaces that have variable tone and grain character. The limitation of a surface film on a horizontal deck surface is fundamental and unavoidable. Wood is dimensionally active — it expands when moisture is absorbed and contracts when moisture is released. On a DFW deck, this cycling happens across every weather event: the board swells during a spring rain, contracts under the following week's dry heat, swells again in the next storm. The paint film bonded to the top of that wood has to stretch and compress with every one of those cycles, and the thermal extremes that North Texas delivers — a deck board going from 70 degrees in the morning to 150 degrees by early afternoon on a summer day — add thermal expansion and contraction stress on top of the moisture cycling. Paint films that cannot accommodate this combined stress crack and separate from the wood surface, and when they crack, moisture enters beneath the film and the failure accelerates rapidly. The result is peeling in sheets, lifting at the board edges, and the particularly frustrating pattern where a deck looks acceptable when dry and shows every film failure the moment moisture hits the surface. Deck stain penetrates into the wood fiber rather than sitting on top of it, bonding at a cellular level with the wood's structure and becoming part of the substrate rather than a separate layer above it. Because stain is in the wood rather than on it, the wood's dimensional movement doesn't stress a surface film — the stain moves with the wood rather than being stretched by it. When stain reaches the end of its service life, it wears through gradually as the wood surface erodes, rather than peeling and flaking in the way that film coatings fail. This wearing-through pattern is significantly easier to address with maintenance recoating than the stripping and preparation required to address widespread film failure on a painted deck. What DFW's UV Intensity Does to Each Finish Category UV radiation is the most relentless factor in the performance equation for any DFW deck finish, and its effect on paint and stain differs in ways that matter for long-term maintenance planning. The Dallas-Fort Worth metroplex receives intense direct UV exposure across a long summer — south and west-facing deck surfaces in Plano, Frisco, and McKinney accumulate annual UV energy loads that compress paint service life timelines that manufacturers developed for moderate-climate conditions. Deck paint contains pigment that blocks UV radiation from reaching the wood beneath, and that UV blockage is one of paint's genuine advantages over clear or lightly tinted finishes. But the same UV radiation that the paint is blocking is simultaneously attacking the binder in the paint film itself, breaking down the polymer chains that hold the film together and give it adhesion to the substrate. On a DFW deck, this binder degradation happens at an accelerated rate compared to what paint manufacturers calibrated their performance claims against. A deck paint that holds its film integrity for five years in a Seattle climate may show significant binder breakdown — and the peeling that follows it — within two to three years on a south-facing Plano deck. Penetrating stains respond to UV differently because their failure mechanism is different. UV degradation of a penetrating stain breaks down the resin and pigment at the wood surface, causing fading and slight surface checking of the wood itself, but this degradation doesn't produce the dramatic film failure that UV-compromised paint experiences. The stain fades and the wood shows some surface gray, but the coating doesn't lift from the substrate or peel in sheets. Maintenance recoating on a penetrating stain — a cleaning and brightening sequence followed by a fresh application without stripping the previous coat — is achievable every two to three years as a regular maintenance cycle, producing a deck that always looks good because it never reaches the point of catastrophic failure that requires the full labor-intensive strip-and-repaint sequence. The Moisture Dynamic Specific to DFW Clay Soils One North Texas variable that affects deck finish performance in ways that homeowners rarely consider is the expansive clay soil — the Blackland Prairie formation that underlies most of the Plano, McKinney, Allen, and Frisco area — and its relationship to deck moisture management. These heavy clay soils shrink dramatically during drought periods and swell significantly during wet periods, and that soil movement affects the grade and drainage patterns around every deck foundation in the region. During extended drought periods — which DFW experiences with regularity, sometimes for months at a time — the clay soil pulls away from deck footings and the surrounding grade shifts in ways that alter how water drains under and around the deck structure. When rain finally arrives after a drought period, the soil absorbs enormous volumes of water before drainage normalizes, and deck boards sitting above this cycle absorb significant moisture from below during wet periods following drought. This bottom-surface moisture absorption is one of the primary causes of paint film failure on DFW decks, because the moisture migrating through the wood from below pushes against the paint film above it in the same vapor pressure mechanism that causes paint to blister and peel — identical to the interior vapor migration problem that affects painted walls in older homes with inadequate vapor barriers. Penetrating stains, which allow the wood to breathe and don't trap moisture behind an impermeable surface film, handle this moisture cycling significantly better than paint in this specific soil and drainage environment. The stain is in the wood rather than on it, so the vapor pressure of drying moisture has a clear exit path rather than a sealed film ceiling to push against. When Deck Paint Is Actually the Right Answer Despite the advantages penetrating stains hold in the North Texas climate, there are specific situations where deck paint is genuinely the correct choice and where its limitations are secondary to the advantages it provides. Decks built from pressure-treated pine that has significant weathering, surface checking, or grain roughness that would telegraph through a semi-transparent stain benefit from paint's ability to provide a uniform, consistent appearance that obscures surface variation. If the goal is a clean, solid color that doesn't show the wood's natural character — and especially if the deck's condition means the wood character is something to be hidden rather than enhanced — paint delivers that result and stain does not. Railings, balusters, and vertical surfaces on decks perform significantly better under paint than under stain because the failure mode that makes paint problematic on horizontal surfaces — moisture infiltration from below driving the film upward — is not present on vertical elements. The gravity-driven drainage on vertical surfaces means moisture doesn't dwell against the paint film the way it does on the horizontal deck boards. Painting vertical deck components while using penetrating stain on the horizontal decking surface is a hybrid approach that professional deck finishers in the DFW market use specifically to get the best of both systems. The Preparation Requirement That Determines Whether Either Option Succeeds Whether paint or stain is specified for a DFW deck, the preparation requirement is the same and it is non-negotiable: the wood surface must be clean, dry, and free of all previous coating residue before any new material is applied. On a painted deck, this typically means stripping the existing paint completely before repainting — applying new paint over a failed paint system produces a result that fails on the timeline of the weakest layer in the system. On a previously stained deck, this means cleaning and brightening the surface and assessing whether the previous stain has built up enough to prevent new penetration — if it has, stripping to bare wood is required. Wood moisture content at the time of application is the most critical preparation variable. DFW's irregular precipitation means that deck boards may have absorbed significant moisture during recent rain events and haven't had adequate time to dry. New coating applied over wood with moisture content above 15 percent will trap that moisture under the new film, producing the bubbling and peeling that appears weeks or months after what seemed like a successful application. In North Texas, where a spring rain can be followed by a dry, hot week that feels like the wood has dried but hasn't fully equilibrated below the surface, checking moisture content with a moisture meter rather than relying on surface feel is the professional standard for a reason. Let Hutch'N'Son Help You Choose the Best System for Your Deck The paint-versus-stain decision for a DFW deck isn't primarily an aesthetic preference — it's a climate-informed technical decision that determines how long your investment holds up and how much labor your next maintenance cycle requires. At Hutch'N'Son Painting, we've spent over forty years watching how every finish category performs on North Texas decks through Plano, Frisco, Richardson, Allen, McKinney, and the greater DFW area, and we bring that specific knowledge to every deck project we evaluate. We'll look at your wood species, your deck's sun exposure, the condition of your existing finish, and your maintenance tolerance to recommend the system that genuinely makes the most sense for your specific deck in this specific climate — not the one that's easiest to apply or most convenient to specify. Contact us today for your free estimate — and let's make sure your deck finishes this Texas summer looking better than it did going in.
Show More